Family Farm

Family Farm
Showing posts with label Thrifty. Show all posts

Tuesday, March 13, 2012

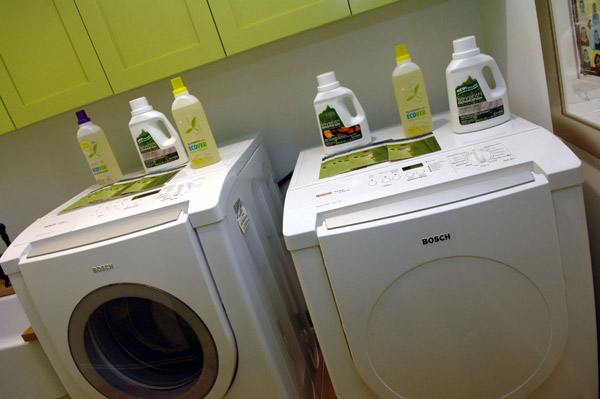
4 Tips for Greener, Cleaner Laundry

http://www.organicsoul.com/4-tips-for-greener-cleaner-laundry/
Green LaunndryFor some people, transitioning to a sustainable lifestyle is something you do step by step. Though we should, not all of us have achieved that bottom line level of efficient, low-waste living.
Not all hope is lost, though: we can each still be working toward a more natural, sustainable lifestyle every day. Instantly jumping to carbon neutral may be impossible, but working toward that goal is something we can start right now.
So let’s visit the laundry room.
It is in there that you’re going through hundreds of gallons of water, tons of electricity, waste and plastic, and time. Laundry is awfully demanding. Despite that, if you’re looking to green this practice and save a few dollars, check out these four simple tips:

Number 1. Wash in Cold

First up, wash your clothes in cold! Many people are concerned about the efficacy of washing when it’s in cold but rest assured, washing your clothes in cold is just as effective as washing your clothes in warm water. Unless you are trying to get out grease, heavy oil, or tough stains, then there should be no problem (and you should probably work on those individually anyways!).
On top of working just as well, washing in cold is also great from the environment. Check this out: washing in cold water for a year equals the same carbon emissions as 164 miles of driving while washing in hot can emit as much as 3595 miles of driving, depending on your rig. That’s a notable difference.
Finally, washing in cold means less energy used. This means an electric bill with fewer dollar signs. Good for the planet, good for you – good idea.

Number 2. Wash when Full

Next up, be sure to wash when you have a full load. This should, by all means, go without saying – why waste resources? Washing when full means washing less often, reducing time spent on loads, and means more efficient use of detergents and cleaners. Fill up those washers and save those dollars!

Number 3. Wash with Health in Mind

While we’re on the subject of cleaners, be sure to choose the right ones! Being green doesn’t just mean you need to efficiently use your resources like water and electricity. It also means you need to be mindful of what you’re putting back into the environment. Unfortunately, many of the detergents and cleaners on the shelves might not have what Mother Earth deems “healthy.”
Bottom line: keep your eyes peeled for surfactant nonylphenol ethoxylate (also known as NPE), phosphates, and harsh bleaches. Instead, go for brands that use natural alternatives, no dyes or fragrances, and nothing harsh for your skin.

Number 4. Low Heat or No Heat – Use the World!

Finally, when it comes to drying, you want to minimize the time spend using your actual dryer. Why? Dryers require a ton of energy, adding a chunk to the CO2 emitted by your washer. The funny this is that you often do not even need a dryer! Plan your washes around the schedule of the sun – by doing that, you can string your clothes up and let the natural warmth from our star do the drying. This can save you hundreds in energy expenses every year and you even get that natural scent in your clothes!

Monday, March 12, 2012

25 Cooking & Baking Tips – Timeless Wisdom Collection

http://tipnut.com/25-cooking-baking-tips/

These tips for cooking and baking are from a large collection of tips I’ve gathered together from a variety of books and magazines from the 1940s and 1950s…most of these are quite unique I think since I don’t recall coming across them before.
  1. Cooking & Baking Tips - Tipnut.comSift flour as it is being emptied into the container. As most recipes call for sifted flour, this will save much time.
  2. Ease graham cracker crusts from the pan by dipping the pie pan in hot water before slicing and serving.
  3. Keep a tin of orange concentrate opened in your fridge and ready for use. Sneak a spoonful into your sweet sauces, icing for cakes, lemon cake mix, fresh salads and ever so many recipes and watch them take on a tang.
  4. Red cabbage will keep its red color if cooked with a bit of vinegar added to the water; add when cabbage is partially cooked.
  5. French toast is made crisper by adding a tablespoon of flour to the egg and milk mixture.
  6. Instead of deep frying croquettes, place them in a greased pan and bake; just as good and much more digestible.
  7. Bacon drippings are valuable–save them. Use as seasoning for vegetables; as a basis for soups and white sauces; to add meat flavor to scalloped dishes; for frying eggs, French toast, potatoes, etc.
  8. A dash of ginger added to chocolate icing gives a delicious, unusual flavor.
  9. Juice from pickled fruits such as crab apples, peaches and pears is wonderful for basting smoked ham.
  10. For a variation in meat balls, add chopped apple to ground meat along with other seasoning, roll into small balls and simmer in tomato puree, seasoned with sage.
  11. Boiled icing will keep soft if a scant teaspoon of vinegar is added with the flavoring.
  12. Add one of the following to the room temperature egg whites for the highest meringue: add a pinch of baking powder; add a pinch of salt; add a generous pinch of baking soda.
  13. A teaspoon of celery salt added to cracker crumbs in which oysters are rolled before frying improves their flavor.
  14. If you can’t find either fresh or dried dill, use 2 or 3 tablespoons of dill seed to each quart of pickles.
  15. When you get through with a tea ball, empty and clean it, then use it to hold onion or other seasoning for flavoring soups and stews.
  16. Something new in frosting! For a white or yellow cake, put 2/3 cup chopped dried apricots (well washed) in the frosting. Flavor with 1/4 teaspoon each of almond and lemon extract as well as the usual teaspoon of vanilla.
  17. If whipping cream won’t thicken, add some instant vanilla pudding powder.
  18. Heavy muffin papers set in muffin tins make excellent gelatin molds. Serve in papers or remove by placing muffin tins in warm water for a few minutes. Top with a cherry or peach slice.
  19. A little crushed or diced pineapple is delicious added to savory stuffing used for roast.
  20. Pastry will be flakier if you include 1 tblsp. orange or lemon juice as part of your liquid.
  21. Diced fruits for salad or desserts can be kept from turning dark by covering them with grapefruit juice.
  22. Once an onion has been cut in half, rub the left-over side with butter and it will keep longer.
  23. Leftover onion will keep much longer then the root is left intact – use top part first.
  24. Leftover eggnog makes a lovely sauce for vanilla ice cream or cake. And mixed with rice, it makes a tasty rice pudding. Just substitute it for the milk in your recipe.
  25. Popcorn should always be kept in the freezer. Not only will it stay fresh, but freezing helps eliminate “old maids”.
More Tips:

Sunday, March 11, 2012

Clothespin Plant Labels

If you run out of labels when #sowing those #seeds, clothes pins are handy in a pinch, pardon the pun.
http://www.facebook.com/pages/Wall-Flower-Studio/378912966080

Fresh Summery Scented Bedding Year Round: {Tip Sheet}

http://tipnut.com/scented-bedding/

Winters are pretty cold here in Canada so windows are kept shut and clotheslines hang empty for months, but there are a few tricks us Northerners have that help us enjoy fresh, fragrant bedding year round (with no nasty chemicals or expensive laundry products).
Beat Those Stale Winter Blues With These Tips
One of the things I miss most in winter is flinging open the bedroom window, stripping the bedding back and letting nature freshen up my bed linens naturally with sun and fresh air. But this list offers options that are just as easy and will provide a fragrance filled sleep year-round.
Herbal Lavender Dryer Bags
Try these easy to make dryer bags filled with lavender buds, they provide a natural moth repellent, sleep aid and a natural antibacterial.
Perfect for lavender scented bedding, these are very easy to make and Bonus! you can skip the commercial dryer sheets when combined with a vinegar rinse (1/4 to 1/2 cup per load).
Easy Trick Using Essential Oils
  • Directions: Fill a small spray bottle with water then add several drops of essential oil (lavender, mint, whatever you like). Shake then spray a clean white washcloth with the water/EO solution until lightly damp, toss in the dryer with the wet laundry. Scent will transfer to the bedding, lovely!
Lavender Buds Vinegar Rinse
Use this recipe for making a lavender vinegar suitable to use as a laundry rinse and fabric softener (as listed here on Tipnut: Lavender Vinegar Recipes):
  • Handful of Lavender Flowers and 1 Pint White Vinegar
  • Directions: Combine lavender and vinegar, seal and let sit for 6 weeks before using. Strain. Use about 1/4 cup in the rinse cycle, increase up to 1 cup per load if stronger scent is desired.
Scented Vinegar Rinse (Essential Oils)
Use this recipe (as listed here on Tipnut: Frugral Fabric Softener Recipes & Dryer Sheet Tips):
  • Using 1/4 cup vinegar in your laundry’s rinse cycle keeps clothes soft. You can set aside a vinegar jug just for laundry and add about 2 dozen drops of your favorite essential oil to the vinegar if you’d like (or as much EO as you feel necessary).
Scented Laundry Booster
Directions:
  • Fill a plastic container with baking soda then add a few drops of essential oil to preference (start with about 2 drops per cup). Stir well with a wooden stick or spoon (not one used for cooking). Seal the container and set aside for two weeks.
  • After two weeks use it as a laundry booster (1/2 cup per load in the wash or rinse cycle–your choice). Do not add any commercial fabric softener.
Homemade Scented Fabric Softener
The fragrance is light once bedding has dried and you can increase the amount of essential oils if it isn’t strong enough for you. Choose your favorite scents and add 1/2 to 1 cup of this mixture at the start of the rinse cycle:
  • 1 cup baking soda, 1 1/4 cups warm water, 8 cups white vinegar, Essential Oils of your choice.

Tips & Tricks

Mattress & Linen Freshener
  • Using your blender, grind until fine 1/2 cup of dried herbs (try mint, lavender, lemon balm, etc.).
  • Mix ground herbs with 1/2 cup baking soda.
  • Sprinkle mixture lightly over mattress pad or cover then top with clean fitted sheet.
  • Spread mixture more heavily on top half of bed where upper body rests to enjoy a consistent fragrance.
Here’s another recipe you can try…
Pixie Dust
1/2 cup baking soda
1/2 cup cornstarch
1 1/2 tsp ground orange zest (dried)
10 drops of your favorite essential oil
  • Blend all ingredients together in a blender then pour into a large shaker. Sprinkle on bed linens as needed.
Scented Starch For Linens
You can substitute the lavender EO in this recipe for any fragrance you like. Recipe Source: Storybook Woods:
  • Dissolve 1 tablespoon cornstarch in 1 pint cold water. Add 6 drops of lavender essential oil. Place in a spray bottle. Shake before using.
Fresh pressed linens, nicely starched, and lavender scent wafting in the air. Nice!
Homemade Linen Sprays
Source: Hallmark Magazine
Combine vodka (which is also a disinfectant), distilled water and fragrant oils to make these lovely linen sprays. Here are three easy to mix recipes from Hallmark Magazine (no longer available online):
Pour 2 TBS 100 proof vodka into a 16 or 32-ounce spray bottle then add the following:
  • Jasmine Bergamot: 1 teaspoon jasmine oil and 1/2 teaspoon bergamot oil
  • Lavender Sandalwood: 1 teaspoon lavender oil and 1/2 teaspoon sandalwood oil
  • Vanilla Ginger: 1 teaspoon vanilla oil and 2 drops ginger oil
Directions: Top the vodka and oils with distilled water, cap and shake to mix. Spray linens as needed, shaking bottle lightly before each use.
Herbal Sleep Pouches
  • Insert the herbal pouch inside your pillowcase at night to help relax and fall asleep easier. To help the herbs last longer, store the pouch in a ziploc bag during the day and place in a drawer out of light, take out and insert in your pillowcase each night. Squeezing the pouch a bit before use will help too.
  • Details to make these herbal pouches can be found here on Tipnut: Homemade Herbal Sleep Pouches. These are also called “Dream Pillows”.
Linen Closet Sachets
  • Directions: Mix 50/50 dried lavender and lemon balm and fill cotton fabric or cheesecloth sachets. Tuck sachets into clean folded linens. These will scent the linens while being stored and can be used repeatedly. Lavender and lemon balm together is a very calming and relaxing mix, perfect for bed linens.

Sleep Easy Suggestions

When scenting your bed linens, it’s tempting to overdo it since you’re likely choosing your favorite fragrances. However, a light application is preferable since headaches and stuffiness may occur if fragrances are too strong (you’ll be sleeping on the linens for hours at a time). Strong smells may also keep you awake rather than ease you into a peaceful sleep.
What To Use
Choose scents that are pleasing to you and help you relax rather than those that perk you up. Your sleep will be more peaceful and less restless. This is especially helpful for those suffering from insomnia or who have regular trouble falling asleep. Some suggestions:
  • Lavender
  • Lemon Balm
  • Lilac
  • Rose Petals
  • Peppermint
Peaceful Sleep Mixes
Lavender is commonly recommended as a home remedy for sleep since it’s thought to be effective in inducing a calm and peaceful rest. It’s also suggested as an excellent repellent for dust mites, so it’s a great choice for linens. Most of the mixes I have collected include lavender…
  • Lavender, Lemon Balm
  • Lavender, Rose Petals
  • Lavender, Rose Petals, Thyme, Rosemary
  • Lavender, Rose Petals, Jasmine
  • Lavender, Peppermint
  • Lavender, Lilac
  • Rose Petals, Lemon Balm, Chamomile
When using dried herbs and flowers to fill sachets and sleep pillows or scent bedding, choose those that are pesticide free for best results. Here are several sachet patterns and tutorials to get you started.

Chicken wire + frame = no more lost earrings!


http://www.facebook.com/pages/Urban-Homesteading-Is-A-Way-Of-Life-Not-A-Copyright/189756707725969

Colorful Tire Planters

Keeping the tires out of our landfills.
Love the fun color!
 

Cool PVC trellis:

http://www.facebook.com/offthegridnews

A pretty cool PVC trellis...

Creative Ribbon Holder

http://www.facebook.com/pages/The-Cottage-House/113774165340147

Turn milk containers into craft supply holders!

http://www.facebook.com/pages/The-Cottage-House/113774165340147
If you do alot of crafts here is a cool way to organize and keep the plastic out of our land fills!

Wine Bottle Planters!

Wine Bottle Planters!
~Thnx to The Cottage House, (http://www.facebook.com/pages/The-Cottage-House/113774165340147?ref=ts)
The Cottage House instructions say: Go to your craft store and buy a bottle cutter, cut the bottom off and fill half full of soil, then place in plants, water and let lay {down} for 5 days or more, the roots will expand and hold in the soil, hang with a wire and water thru the top!

Fabric Softener Recipes & Dryer Sheet Tips

http://tipnut.com/frugral-fabric-softener-recipes-dryer-sheet-tips/

Here are several quick tips for cutting costs on fabric softeners and sheets, each point is a separate tip. Next you’ll find two recipes for making your own (one scented), plus instructions for reusable dryer sheets, bags and wool balls.

Save Money By Using Frugal Fabric Softeners That You Can Make Yourself
  1. Using 1/4 cup vinegar in your laundry’s rinse cycle keeps clothes soft. You can set aside a vinegar jug just for laundry and add about 2 dozen drops of your favorite essential oil to the vinegar if you’d like (or as much EO as you feel necessary).
  2. In a pail mix 1 gallon of water and 1 cup concentrated liquid fabric softener. Dip a sponge or washcloth in the liquid, squeeze out excess and toss in the dryer with your laundry. Seal pail when not in use.
  3. Pour liquid fabric softener and hot water in a spray bottle (50/50 mix) and lightly mist wet laundry before starting the dryer. Two or three good shots should do it. You could also just spritz a clean washcloth and toss that in the dryer.
  4. Cut dryer sheets in thirds or halves, use one strip per dryer load.
  5. Mix equal parts hair conditioner and water and store in spray bottle. Mist a washcloth or sponge and toss in dryer with wet load.
  6. Use about 1/4 to 1/2 of the liquid fabric softener that they recommend on the bottle.
  7. 1/8 cup baking soda added to laundry and 1/4 cup vinegar in the rinse cycle.
  8. Use a Downy ball if you have one–just use vinegar instead.
  9. Soak a washcloth in full strength liquid fabric softener. Wring out excess, then lay out to dry first before using–helps prevent staining laundry the first time. To use: toss the dried washcloth in the dryer and use again and again until it no longer works. Resoak when needed (you should be able to do a few dozen dryer loads per soak).
Recipe:
1 part Vinegar
1 part Baking Soda
2 parts Hot Water
  • Place a pail large enough to hold double the amount of ingredients in the kitchen sink or bathtub. Mix the baking soda and water in the pail, stir till the powder is dissolved. Then add the vinegar.
  • Remember that baking soda and vinegar reacts with fizzing, so use a big pail to account for this. Once it’s stopped fizzing, pour into clean bottles, cap, then use 1/4 cup per rinse cycle.
  • Updated Info: The baking soda won’t be completely dissolved, just shake the bottle to mix the batch up before adding to the rinse cycle.
Scented:
Cheryl sent in this recipe that is scented with your favorite essential oils.

Freshen & Soften Laundry With Your Favorite Scents Using This Easy Recipe


I’ve had good success with this fabric softener and enjoy trying different fragrances just to keep things interesting. The scent is light once clothes have been dried and you can increase the amount of essential oils if the fragrance isn’t strong enough for you.
Ingredients:
1 cup baking soda
1 1/4 cups warm water
8 cups white vinegar
Essential Oils
Directions:
  • First mix the vinegar and water together then add the baking soda gradually, stirring the whole time. You will want to make sure to use a large pail to accommodate the fizzing activity from the baking soda and vinegar reaction.
  • Use a funnel to pour this mixture into a washed, gallon sized milk jug (plastic), add 1/3 teaspoon of your favorite essential oil, cap and seal then shake well.
  • To use: Shake each time before use, adding 1/2 to 1 cup at the start of the rinse cycle.
Thanks for sharing this recipe Cheryl!
For essential oil ideas, consider germ fighting gems like Eucalyptus or Tea Tree. If scent is what you’re after, consider lavender or even citrus favorites like orange or lemon.
Reusable Dryer Sheet Instructions:
Flannel pieces
4 TBS liquid softener
10 TBS water
  • Cut fabric sheets from old flannel pajamas or leftover flannel fabric from sewing and cut into 3″ x 5″ strips (approximately).
  • Stack flannel strips in a cleaned margarine tub (large size) or plastic container (cleaned baby wipes container works well too). Mix the liquid softener and water together, then pour evenly over top of stacked flannel strips.
  • Seal container and shake well.
You can use several dozen strips with this mixture. Leave sealed for 2 or 3 days, then use one flannel strip per load–squeeze out excess if necessary (it should be just damp). Keep container sealed at all times. Wash strips after use, then use again to make another batch when needed.
Herbal Lavender Bags:
*First published September 27, 2007 and moved to this page for better organization
Fresh and fragrant laundry can be achieved chemical free with easy to make lavender dryer bags. Using lavender buds gives the benefit of a natural moth repellent, sleep aid and a natural antibacterial.
Skip the fabric softener sheets, use 1/4 cup vinegar in your rinse cycle (for static cling help, up the amount to 1/2 cup if needed) and toss the herbal sachets in the dryer for fresh smelling laundry. For optimal benefit, use organic lavender.
Materials Needed:
5″ x 5″ cotton muslin or cheesecloth squares (2)
Thread
Lavender
Directions:
Lavender & Towels
Lavender & Towels
  • Sew large “tea bags” out of the muslin or cheesecloth squares, leaving an opening at the top to fill with lavender. Sew the top shut. No need to sew fancy, just place the squares together and sew a single seam along the top about 1/4″ from the edge.
  • Roughly squeeze the bags before tossing in the dryer with wet laundry. When laundry is done the scent is light, not overwhelming at all. Especially nice to use on loads of bedding (sweet, fragrant dreams).
  • Bags are reusable! When the lavender is no longer doing its job, take a seam ripper and open about 2″ on one end, empty the bag, refill and sew shut. For one last kick at the can, crush the used lavender and toss it around your carpet. Let sit for about an hour then vacuum.
Tip: Make more than one dryer bag so that the same bag isn’t in one load after another, alternate them so each bag has a chance to cool down before being used again.
How To Make Wool Dryer Balls:
*First published July 30th, 2008 and moved to this page for better organization
Never buy fabric softener again with today’s feature from Good Mama: Make Your Own Wool Dryer Balls, how cool are these! The balls will cut your drying time yet leave clothes soft, fluffy and static free without the use of chemicals or dryer sheets. Based on the old “tennis ball in the dryer” trick, but without the tennis balls!
What You’ll Need:
DIY Wool Dryer Balls from goodmama.typepad.com
DIY Wool Dryer Balls By goodmama.typepad.com
  • Wool Yarn: Use 100% wool or a good felting yarn for best results. . . Great yarn stash buster!
  • Old Pantyhose: You can also use a sock
  • Cotton or Acrylic Yarn or String: Use to tie closed the hose (or sock). Don’t use wool yarn for this part–scraps are good for this too.
  • Scissors
  • Small Crochet Hook
  • Measuring Tape
  • Optional – Sachet of Dried Flowers or Herbs: Make your own scented dryer balls by winding your ball around a little sachet of fragrant dried herbs & flowers. The scent doesn’t last forever, but still a nice touch!
Basic Steps:
  • First make the core by winding small balls of yarn (tight), then tie them off in a nylon stocking or sock. Wash the batch in preferably hot water and dry to felt them (keep the balls attached together in the stocking, you don’t need to cut them off to separate at this point). Wash and dry again if you want to felt them more.
  • Next cut the balls loose from the stocking, wind more yarn around the balls to the size you want, tie them off in a nylon stocking again and wash then dry to felt. Doing this in two steps keeps the inside of the balls tight and will hold together better than a ball done in one step.
  • Once they’re at least slightly felted, the balls are good to use. They will continue to felt and get harder as you use them.
Tips:
  • If the yarn is machine washable, don’t use it for this project.
  • Use a crochet hook to tuck in the ends of the yarn so the ball stays tight and doesn’t loosen up through use.
  • Wind the balls about 10-10.5 inches in circumference prior to felting, they will shrink as they felt.
  • When first making the balls and felting them, you can toss them in with loads of laundry to save water and time. Be aware there may be some dye bleeding though if it’s not colorfast yarn–throw them in with a load of towels in similar colors.
  • When ready to use, start with a couple balls in the dryer then work your way up to the amount of balls that give you the best results.
  • The wool balls may get pills on them with use, just give them a shave with a sweater shaver as needed (if you want–otherwise ignore!).
Please visit Good Mama for a complete set of details that include a lovely set of photos outlining the entire process for making the dryer balls (link at the top), also note her copyright and the licenses and restrictions.

Recycle your old coffee creamer bottles!

I saw this and thought it was such a CLEVER idea! These could go with you when you're out or stay in the cupboard for organizing! Here's where I found it: http://whynotdoityourself.tumblr.com/post/17254235216/great-use-for-those-coffee-creamer-bottles
 

Sunday, February 19, 2012

30+ Lunch Bags & Accessories To Make

http://tipnut.com/lunch-combo/

Here is a large collection of free patterns and tutorials for bags, totes and sacks that you can use (again and again) for carrying your lunch. Not only do they cut down on waste, they’re super cute too! There’s also a nice collection of reusable sandwich/snack bags & wraps that you can make listed at the bottom. Enjoy!
knitty.com

Repurposed Etched Glass Spice Jars...

http://www.instructables.com/id/Repurposed-Etched-Glass-Spice-Jars/

Hint: click on each little pic for the directions on the site above!

Repurposed Etched Glass Spice Jars...

Top 10 Real Foods to Store Without Electricity

http://www.commonsensehome.com/preparedness-real-foods-when-you-need-them-most/
Check out this and more from Common Sense Home at the link above!

One question that I’ve been seeing a lot in preparedness discussions is how to make real, “living” food a part of your storage plans.  Many food storage lists include large amounts of heavily processed food items because they are cheaper, readily available, and have amazing shelf lives.
That’s all well and fine, but you’re supposed to rotate your food storage items regularly by eating out out your storage, and I am not eager to live off of MRE’s, freeze dried meals with hydrolyzed vegetable protein, and commercially canned goods that may contain mold or other questionable ingredients.  (We do keep some MREs and freeze dried meals, but they do not make up the bulk of our storage.)
So what are some of the best options for “real food” storage foods?  Here are my top ten choices for  foods that can be stored at room temperature for extended periods:

1.  Lacto-fermented vegetables

:  Large containers of properly fermented vegetables can last for months, if not over a year, in cool conditions (for instance, an unheated basement).  Captain Cook used kraut on his ships to prevent scurvy, as did other sailors.  My husband remembers my mom talking about how they would preserve large crocks (15-20 gallons or more) or kraut from season to season.  She said it would sometimes taste a little different but it was still good.  In my own experience, this past season I keep two one gallon crocks of kraut in my basement from October until May – seven months – and the quality was still acceptable at that time.
In this photo, you can see that there was mold growth on the top of the kraut container (here’s the original post on how I made the sauerkraut).
Once the airlock bag was removed and the sides wiped down, you can see that the kraut underneath was not moldy.
The kraut around the edges was a little softer, but the center was still fairly crisp.
The flavor was a little more tangy/bubbly than younger kraut.  At this point I repackaged it into smaller containers and put it in the fridge and freezer.  Sauerkraut is very high in vitamin C, and is also a good source of vitamin K, which is often deficient in modern diets.  Home canned fruits and vegetables are also acceptable, but they are not quite the nutritional powerhouses that lacto-fermented products are.  If you decide to purchase canned food items, make sure to buy from a reputable source.

2.  Live Culture Dairy

- If you keep a yogurt culture that works at room temperature (such as viili from Cultures for Health, which I use), you can use it to culture powdered milk without a yogurt maker.  While powdered milk is not ideal, it does store without refrigeration.  Culturing makes the nutrients much more digestible.  Milk kefir is also an option for a drinkable product.  Milk kefir grains can also be used to culture coconut milk, if they are are occasionally revitalized in milk.  Kefir provides protein, minerals and B vitamins.  Traditional hard cheeses (such as Parmeson) may also last for months in cool dry temps.

3.  Whole grains

- Whole grains (in general) have excellent shelf lives, much longer than milled flours.  Places like Emergency Essentials (listed on my sidebar) sell grains and grain mills (electric powered and hand powered).  If you keep a sourdough culture, you can use it to make many baked goods, not just bread, such as sourdough crackers.  Again, using sourdough culturing makes the nutrients in the grain more available.  Grains can also be sprouted and used to make a simple essene bread, which is very filling and nutritious.

4.  Chia seeds

- Chia seeds have a shelf life of 4 to 5 years for dried seeds.  They have omega-3 and omega-6 essential fatty acids, fiber, B vitamins, calcium and protein.  They can be used to make drinks and no-cook puddings, as well as adding nutrition to baked goods and smoothies.

5. Sprouting seeds

- Sprouting seeds also have a great storage life, generally 2 years or more.  They are generally high in vitamin C, and may also contain other antioxidants and essential nutrients.  They also provide fresh, growing food in a hurry when it may be in short supply.  Sprouting seeds are easy to use.  You can grow them in handy sprouting kits,  or in sprouting bags or even nylon stockings.  Mary Bell (in the Dehydrator Cookbook) suggests bringing sprouting seeds with you while camping.  She says to soak them overnight in a bag of water, and then place them in a section of nylon sock attached to your backpack.  Rinse daily, and in a few days you’ll have live, crunchy additions to your trail rations.

6.  High Quality Saturated Fat

- Coconut oil, lard and tallow will all keep for at least 12-18 months (most likely longer) in sealed, airtight containers kept in a cool area.  Your body needs healthy fats.  Your brain is largely made up of fat, as is protective coating on your lungs, and many other critical body systems.  Fats are energy dense, which is also critical during emergency situations.

7.  Dried Legumes

- Dried beans have a great shelf.  They will keep around a year in just the plastic bags from the store, 10 to even 30 years if sealed in airtight containers with oxygen removed.  Utah State University Cooperative Extension states:  “Dry beans average about 22% protein in the seed, the highest protein content of any seed crop. They contain all essential amino acids, except methionine. Methionine can be obtained from corn, rice, or meat. Beans are an excellent source of fiber, starch, minerals and some vitamins. ”

8.  Real Salt

- Unrefined salt has many trace minerals that are essential to health.  In my experience, the unrefined salts (Real Salt, grey sea salt, pink salt, etc.) have a “saltier” more robust flavor, meaning you can use less to achieve the same result.  Salt can also be used to preserve food (such as fermenting vegetables, above, and meats).  Since ancient times, salt has been also used as a valuable trade commodity.

9.  Bulk Spices, Herbs and Teas

- Don’t underestimate the power of herbs and spices.  As well as being high in antioxidants and anti-inflammatories, many of them have preservative properties as well.  The New Agriculturalist explains:
“Cinnamon is just one of a large number of spices that have long been known to preserve food. Recent research has tried to find out exactly how effective the spice can be, over what time period, and in suppressing which bacteria. At Kansas State University, microbiologists have been testing the effectiveness of cinnamon and other spices in eliminating one of the most virulent bacterial causes of food poisoning, E.coli type 0157. Complications arising from the bacteria can include anaemia and kidney problems, and a serious outbreak can lead to fatalities. The Kansas researchers found that cinnamon added to apple juice that had been contaminated with E.coli, was able to kill 99.5% of the bacteria within three days, at room temperature. They also did tests on meat and sausage, and found that cinnamon, cloves and garlic all had a powerful ability to stop the growth of the bacteria. Other microbiologists in Tennessee have found that oils extracted from oregano, coriander and basil, also have strong anti-microbial properties. In future we may see more natural preservatives supplementing the synthetic compounds currently in use.”
I store my spices and herbs in glass jars out of direct light (sometimes using the sock trick).  I buy in bulk (generally from Frontier or Mountain Rose Herbs, listed on the sidebar), store a small amount in the cupboard and the rest in the bulk food storage.  Both stores sell small, inexpensive glass shaker jars to repackage your spices for easy use.  Larger spices, such as cinnamon sticks or other “chunky” spices, can be vacuumed sealed in mason jars to extend shelf life.  Under cool, dry conditions out of direct light, spices should have a shelf of two years.  They can still be used after this time, but potency will diminish.  Spices could also be used as a trade commodity.

10.  Sweeteners, Including Refined White Sugar, Raw Sugar, Honey and Maple Syrup

- I’m sure some foodies will cringe at the inclusion of white sugar, but it is less expensive than the other options and has a great shelf life (white sugar will last indefinitely if kept in a sealed container in a cool, dry location).  It can be used as a preservative for fruits.  Sugar can be used to heal wounds (as can honey).  (More details on the sugar for wound healing here.)  I use sugar to brew my kombucha, too.  Raw sugar can store as well as regular sugar, but may be cost prohibitive for many.
Honey can store easily for over a year, possibly decades. They have found edible honey in tombs over 1000 years old. To store honey, Honey.com states:
Processed honey should be stored between 64-75°F (18-24°C).1 Honey can be exposed to higher temperatures for brief periods; however, heat damage is cumulative so heat exposure should be limited. It is best to minimize temperature fluctuations and avoid storing honey near heat sources.
The recommended storage  temperature for unprocessed  honey is below 50°F (10°C).  The ideal temperature for both unprocessed and processed honey is below 32°F (0°C).  Cooler temperatures best preserve the aroma, flavor and color of unprocessed honey.
Maple syrup has the shortest shelf life – around one year in glass bottles without freezing or refrigeration.
There are many other food options, but these are my top choices for foods that store a long time without refrigeration.  I’ll be covering various food preservation techniques in more detail in the coming months (it’s my thing :-) , including drying, canning, freezing, fermenting, preserving in alcohol and whatever else I can think of trying.
In addition to food, water is critical.  We just bought a new Berkley water filter, and I’ll be writing a review of that soon, along with with other tips for storing water.  We’ve got the Berkley on the counter right now, filtering our tap water.  I’m not sure I’m brave enough to try mud puddle water, but I’m considering it…

What Can I Do With Orange Peels?

http://frugallysustainable.com/2012/02/what-can-i-do-with-orange-peels/


Citrus is in season, and at our house we have been inundated with an abundance of orange peels! Sticking to the value of “waste not” — I set out to find a solution for re-purposing the peels. In my search, I found not one, not two, but countless ways to reuse those once discarded items. And here are my favorites:
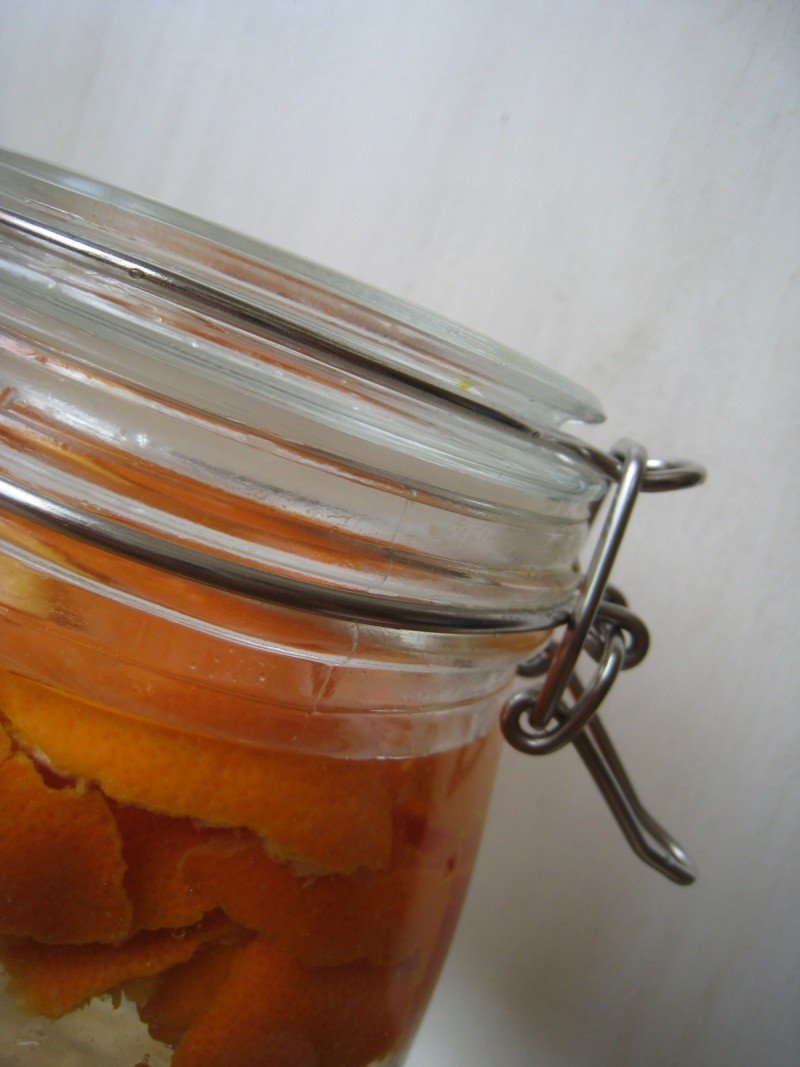
{Orange-Infused Vinegar}
Recipe: Cover orange peels with white vinegar. Let it steep for a few weeks. Load into a spray bottle and use for cleaning.

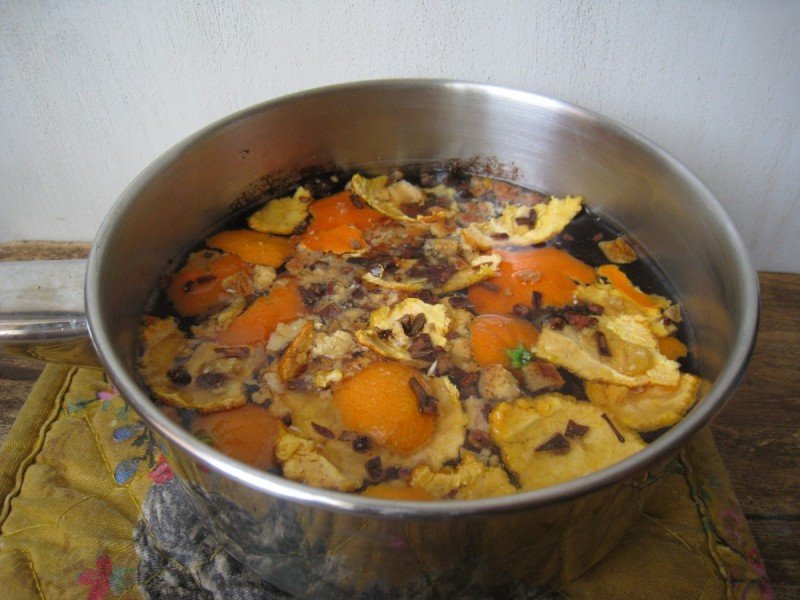
{Stove-top Potpourri}
Recipe: To a medium sized pot, add orange peels and spices such as cloves, nutmeg, and cinnamon. Simmer on low-heat to infuse the home with a lovely scent.

{Citrus Sugar Scrub}
Recipe: Zest the peel of an orange and add it to 1 cup of sugar and 1/2 cup of olive, almond, sunflower, or grapeseed oil. Mix all ingredients in a bowl and store on the counter in a glass mason jar.

Other ways to use orange peels:

Thursday, February 9, 2012

Best heated chicken waterer

http://avianaquamiser.com/posts/Best_heated_chicken_waterer/

  Best heated chicken waterer

Heated chicken waterer using heat tapeSick of frozen chicken waterers?  It's quick and easy to turn your existing waterer into a heated waterer, some of which will keep your water liquid down to 20 below.  Here are the top DIY options:
  • Pipe heating cable --- Sandwiching a line of heat tape between a pair of five gallon buckets has the side benefit of forming a lip that gives the nipples a bit of extra protection.  Waterproof heat tape can even be threaded into PVC pipe waterers.  Estimated cost --- $26.
  • Heated bucket waterer --- Modifying a pre-made heated bucket to work with our chicken nipples is one of the quickest methods of making a heated chicken waterer, and the lip that protects the nipples is reported by one customer to keep his water thawed down to 20 below.  Estimated cost --- $50.
  • Stock tank deicerStock tank deicer --- Throwing a stock tank deicer in an existing bucket waterer is a very dependable option since these sturdy deicers are made to deal with freezing temperatures and constant use. Estimated cost --- $25.
Some other workable solutions include:
  • An aquarium heater plus thermocube --- Aquarium heaters are the cheapest option, but they tend to have a short working life and to break down at inopportune moments (shocking your birds if the glass cracks!)  Adding a thermocube to the assemblage means that the aquarium heater only turns on when the temperature drops below 35, making the arrangement safer and using less electricity.  Estimated cost --- $30.
  • Bird bath deicerBird bath deicer --- These are very similar to stock tank deicers, but look to be a little more expensive.  Estimated cost --- $35.
  • Rain gutter heater --- This is similar to pipe heating cable and works well in PVC pipe waterers.  A quick search of the internet suggests that a rain gutter heater costs over $100, but I could be looking in the wrong places!
  • Heat lamp --- In a pinch, a heat lamp aimed at your waterer's nipples will keep the water from freezing during moderately cold weather.  The problem with this design is that it's not thermostatically controlled like the other options, and you're heating the air rather than the water, so you'll use a lot more electricity.  However, the start-up cost is very low -- $10 for the bulb and perhaps another $10 if you don't have a reflective fixture (and chicken keepers are likely to already have both on hand.)  In warm climates where you only see a freeze warning occasionally, this is a very good option.  We also find that adding a light shining on the nipples is an effective way to supplement other heating options when the temperature drops into the low teens and freezes the nipple.
So, who won our heated chicken waterer contest?  I had to make Mark judge the contest since I wanted to give out at least half a dozen prizes.  Congratulations to Lu Ann and Christian Shank who came up with a design that is elegant, cheap, and effective!  We'll be putting a 10 pack DIY kit in the mail to them shortly.

Ready to put together your own heated chicken waterer?  All of the designs on this page start with our homemade chicken waterer kit, starting at $15.


AWESOME RECYCLING IDEAS...

http://www.facebook.com/pages/Gypsys-Melting-Pot/238568062871826
http://www.facebook.com/media/set/?set=a.270291769699455.64455.238568062871826&type=1

Real Food Tips: 34 Random Food & Cooking Tricks

http://www.100daysofrealfood.com/2012/02/09/real-food-tips-34-random-food-cooking-tricks/

Monday, February 6, 2012

Homemade Toilet Bowl Cleaner

http://everythingishomemade.com/2010/10/26/homemade-toilet-bowl-cleaner/

By Amy:
Have I got a gem for you today.  Several weeks ago I whipped up a homemade toilet bowl cleaner when I was cleaning my bathrooms one weekend.  I wanted to share it, but  I didn’t write anything down of course and couldn’t remember what all I used.  So the next time I cleaned my bathroom I made sure to measure and write down the ingredients so that I could share the recipe with you.
I had never made homemade toilet bowl cleaner before because to be honest, I wasn’t sure how to apply it!  Commercial cleaners have that nice angled neck on the bottle that allows you to squirt the cleaner right up under the rim.  I wasn’t about to stick my hands up under there so I continued on using commercial cleaners until just recently.
Then it struck me one day that I could use a condiment squirt bottle!  In the picture below, it’s the bottle on the far right hand side.  I had picked up two of these bottles one day a long time ago at Bed, Bath & Beyond.  I believe they were around $2 each.  One I use for white vinegar in the kitchen.  And the other one just sat there unused.  I think I had intentions of putting chocolate sauce in it so I could make fancy desserts, but well that never happened.  So I’m using it for toilet cleaner instead. :D
Here are all the ingredients and supplies you need besides a spoon and water which are not pictured.  So simple!  I usually make enough to clean the 2 toilets in the house and that’s it.  The cleaner will stay good for awhile, but it’s so easy to make that I just make up a new batch each time I’m cleaning.

Homemade Toilet Bowl Cleaner
Enough to clean 2 toilets
3/4 cup baking soda
1/2 cup water
1/2 tsp castille soap with tea tree
(Alternatively you can use regular castille soap and then add a few drops of tea tree oil)
Large measuring cup or bowl with a spout
Condiment squirt bottle
Spoon
In the measuring cup, stir together the baking soda and water.  It should be slightly thick.  You want it to be thick so it will coat the toilet bowl.  Then add 1/2 tsp of castille soap and stir.

Once combined, pour mixture into the condiment bottle (this is why having a spout on the bowl is handy).

With your finger over the tip, shake to combine again.

Make sure all the baking soda that settled to the bottom gets incorporated into the mixture.

Now you are ready to clean the toilet!
The application can be a little tricky.  You have to angle the bottle down so the mixture goes to the tip.  But yet you want it up slightly so you can squirt it up under the rim.  You’ll get the hang of it after a few tries.

From here, the cleaning is exactly the same as with commercial cleaners.  I squirt the homemade stuff all around the bowl, up under the rim.  It runs down and coats the bowl, just like the expensive stuff.  I let it sit for several minutes and then scrub it out with the bowl scrubber.
I’m no scientist, so I can’t test my toilet for bacteria and all that.  So I can’t tell you for certain how well the homemade cleaner works.  But I will say that my toilet looks clean and smells clean!  And really, isn’t that all the certainty you get from the commercial cleaners anyway?
If you try this, let me know how it works!

Followers