Family Farm

Family Farm
Showing posts with label Craft. Show all posts

Tuesday, March 13, 2012

Winter Potpourri Recipes & More...

Pine cone potpourriSpice up your hospitality and generosity this winter with a few festive potpourri fragrances.
Use all-natural ingredients to combine the scents of the season and fill the air with cheer.

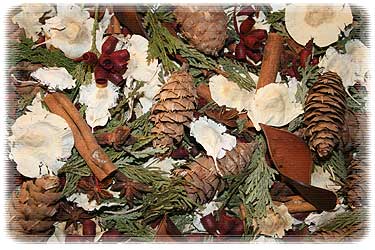
Pine Cone Potpourri

The holiday season is a perfect time to make potpourri for your home or for gifts. Try this simple and festive recipe from A World Of Plenty:
Ingredients:
8 pounds of pine cones
3/4 ounce bayberry fragrance oil
1/4 ounce cinnamon fragrance oil
1/4 ounce clove fragrance oil
1/4 ounce orange fragrance oil
Fill a trash bag a little over half full with pine cones. Drop the oils in over the cones, and mix them in the bag so that the oils are distributed evenly over all the cones. Fasten the top of the trash bag and leave the pine cones for a couple days to pick up the scent of the blended oils.
You can add cinnamon sticks, pine boughs and flower pedals to the mix to add more fragrance and color to the potpourri.
“Display in decorative baskets or bowls along with, for color and variety, long cinnamon sticks, tangerines orpomegranates, cedar tips, or your own cut evergreen tips. Or keep by the fireplace and toss in for a quick burst of scent.”

Holiday Herbs

This potpourri recipe from the Herb Companion is a little more intensive than the pine cone recipe, but it makes a potpourri from dry ingredients, which creates a “mild, sweet, almost candylike scent.”
Ingredients:
4 cups of rose petals
2 1/2 cups lavender flowers
2 cups each anise hyssop flowers, flowering tops of peppermint, pink rosebuds, oakmoss, and sweet woodruff leaves
1/2 cup each allspice berries, aniseed, and cloves
1 cup each cinnamon chips, rosemary (or substitute pine or fir needles), holy basil tops (or substitute sweet Annie or increase the aniseed), and chopped calamus root
1 vanilla bean, chopped in 1/4-inch pieces
1/2 teaspoon tangerine fragrance oil
1/4 teaspoon cinnamon fragrance oil
1/4 teaspoon pine or fir fragrance oil
Combine the dry ingredients together and stir them gently until mixed, then add the fragrance oils the the mixture. Let the mixture rest in sealed jars for at least two weeks.
Display your potpourri in a large glass jar or a basket, or give your potpourri as a gift in a jar or tin. You can also fill sachets with your potpourri to spread the scents in your closets and drawers.

Monday, March 12, 2012

Quick Orange Peel Vinegar Cleaner!

Orange peels, vinegar in a quart jar, let sit for 10 days or so...strain out the liquid and use as an all-purpose cleaner. Easy, cheap, natural, smells good!
 

Sunday, March 11, 2012

Chicken wire + frame = no more lost earrings!


http://www.facebook.com/pages/Urban-Homesteading-Is-A-Way-Of-Life-Not-A-Copyright/189756707725969

Plastic Milk Bottle Plant Containers!

A great GARDENING project for KIDS! Plastic milk bottle = FUN plant container! Here's How! http://ow.ly/9A4wh
 

Cute Outdoor Chalkboard!

We LOVE the idea of an OUTDOOR chalkboard! This one is DARLING! Here's How! ♥♥♥ http://ow.ly/9A2ay
 

Dying Easter Eggs...Naturally

http://fresh-eggs-daily.blogspot.com/2012/03/dying-easter-eggsnaturally.html

Dying Easter Eggs...Naturally


It's almost Easter.  And Easter means colored eggs.  Of course if you have some colored egg-laying chickens, you don't need to worry about dying eggs for Easter, but since this is our first spring having white duck eggs, I wanted to try some.  I decided to experiment with natural ingredients for the dyes instead of using either food coloring or Kool-aid.

Its was so easy and the results were glorious as you can see !  

Here's the method that I used and then some suggestions for ingredients to use to achieve an assortment of beautifully dyed eggs.  The beauty of this method is that you hard boil and color the eggs in one step.
I started with a bowl of white duck eggs (although you can use white chicken or goose eggs also) and rinsed them in warm water, scrubbing gently to remove the bloom.  

Then I placed a few eggs in a small pot in a single layer and covered them with water, adding 1 Tablespoon white vinegar per Cup of water, along with whatever I was using as coloring agent, brought the mixture to a boil and then simmered for 15-20 minutes, checking the color intensity after 10 minutes.
~eggs simmering in onion skins~

~eggs simmering in beets/stalks~

When I had achieved the desired color, I removed the eggs gently and placed them in a plastic egg carton to dry.  I poured the remaining water mixture (except the onions,coffee grounds and wine) into a large bowl to give to the chickens when I was done.  

When the eggs were dry, I rubbed each with a cotton ball dipped in cooking oil and then buffed gently with a clean paper towel to give them a beautiful shine.
 

These are the colors I got from various common food items:

CRANBERRY JUICE/CRANBERRIES ~ PINK
I didn't use any water, but instead covered the eggs with the cranberry juice (fresh or frozen cranberries would also work - I just didn't happen to have any) and added 1T white vinegar per Cup of juice to get a nice rosy pink.

BEETS & STALKS ~ BEIGE
I added two sliced fresh beets and stalks to enough water to cover the eggs (canned beets would also work)  for a beige color.

ONION SKINS ~ ORANGE
Onion skins produced an orangish color. One egg came out after about 10 minutes, the others I left in for 20 minutes for a contrast in colors. (I discarded the skins when I was done)

TURMERIC~YELLOW
I added a few Tablespoons of turmeric to the water and white vinegar for cheery yellow eggs.

SPINACH~GREEN
A handful of fresh spinach leaves added to the water/vinegar produced pale green eggs.

BLUEBERRIES~BLUE
Fresh blueberries, mashed and added to the water and vinegar produced gorgeous blue eggs.

RED WINE ~PURPLE
Again, no water, just boiled the eggs in wine and added 1T white vinegar per Cup of wine
(the wine I discarded when I was done) and got a pretty purplish color.

COFFEE~TAN/BROWN
I brewed a pot of strong coffee, putting the eggs right into the carafe while the coffee was brewing, and then leaving them to steep for 10 minutes for the lighter tan and 20 minutes for the darker color. I discarded the coffee when I was done.

I ended up with a beautiful assortment of naturally dyed eggs ...

and the chickens got a nice fruit and veggie soup mix to enjoy.

Try these ideas or others - such as pomagranites, carrots, or other types of greens.

Happy Easter ...

from the Ducks !
~stock photo~

You can also use blown eggs so they will last indefinitely.


Cool PVC trellis:

http://www.facebook.com/offthegridnews

A pretty cool PVC trellis...

Creative Ribbon Holder

http://www.facebook.com/pages/The-Cottage-House/113774165340147

Turn milk containers into craft supply holders!

http://www.facebook.com/pages/The-Cottage-House/113774165340147
If you do alot of crafts here is a cool way to organize and keep the plastic out of our land fills!

~~***DIY--WOODEN SPOON GARDEN STAKES***~~

 
~~***DIY--WOODEN SPOON GARDEN STAKES***~~

*** I love this idea..and I going to use these this year...what a perfect and inexpensive way to have custom garden stakes !!!***
I found this pic on Pinterest...sorry no link....
http://www.facebook.com/GypsysMeltingPot

Make a Rain Barrel to Save Water

Follow this step by step: http://www.bhg.com/gardening/yard/tools/make-a-rain-barrel-save-water/#page=2

Rain Barrel

Wine cork herb markers!

We LOVE how this gardener RECYCLES wine corks! These make GREAT herb markers! ♥♥♥ http://ow.ly/9uCfT
 

Make Your Own Pure and Natural Bath Salts

Natural Bath Salts

Making your own natural bath and body products can be a fun hobby. You don’t have to sniff through aisles of products filled with unnatural ingredients and artificial fragrances; instead, you are in charge. You can mix up your own custom blend that soothes your senses and saves the sinuses.
If you decide to create your own bath salts, varieties of purely natural options are at your disposal. When you’ve found your favorite base, I suggest purchasing it in bulk from an online source, simply because it is much more economical. However, it is important to be aware that not all sources of salt are created equal. Unfortunately, there are providers that blend a small amount of premium salt with a lesser grade, and yet it retails at full price. Sometimes minerals can be removed from the salt thus creating an inferior product. Also, beware of bleached white salt because it is a sure sign that valuable minerals have been removed. Since you are investing time into making your own blend, spend a few moments to make sure you’re using a high-quality base.
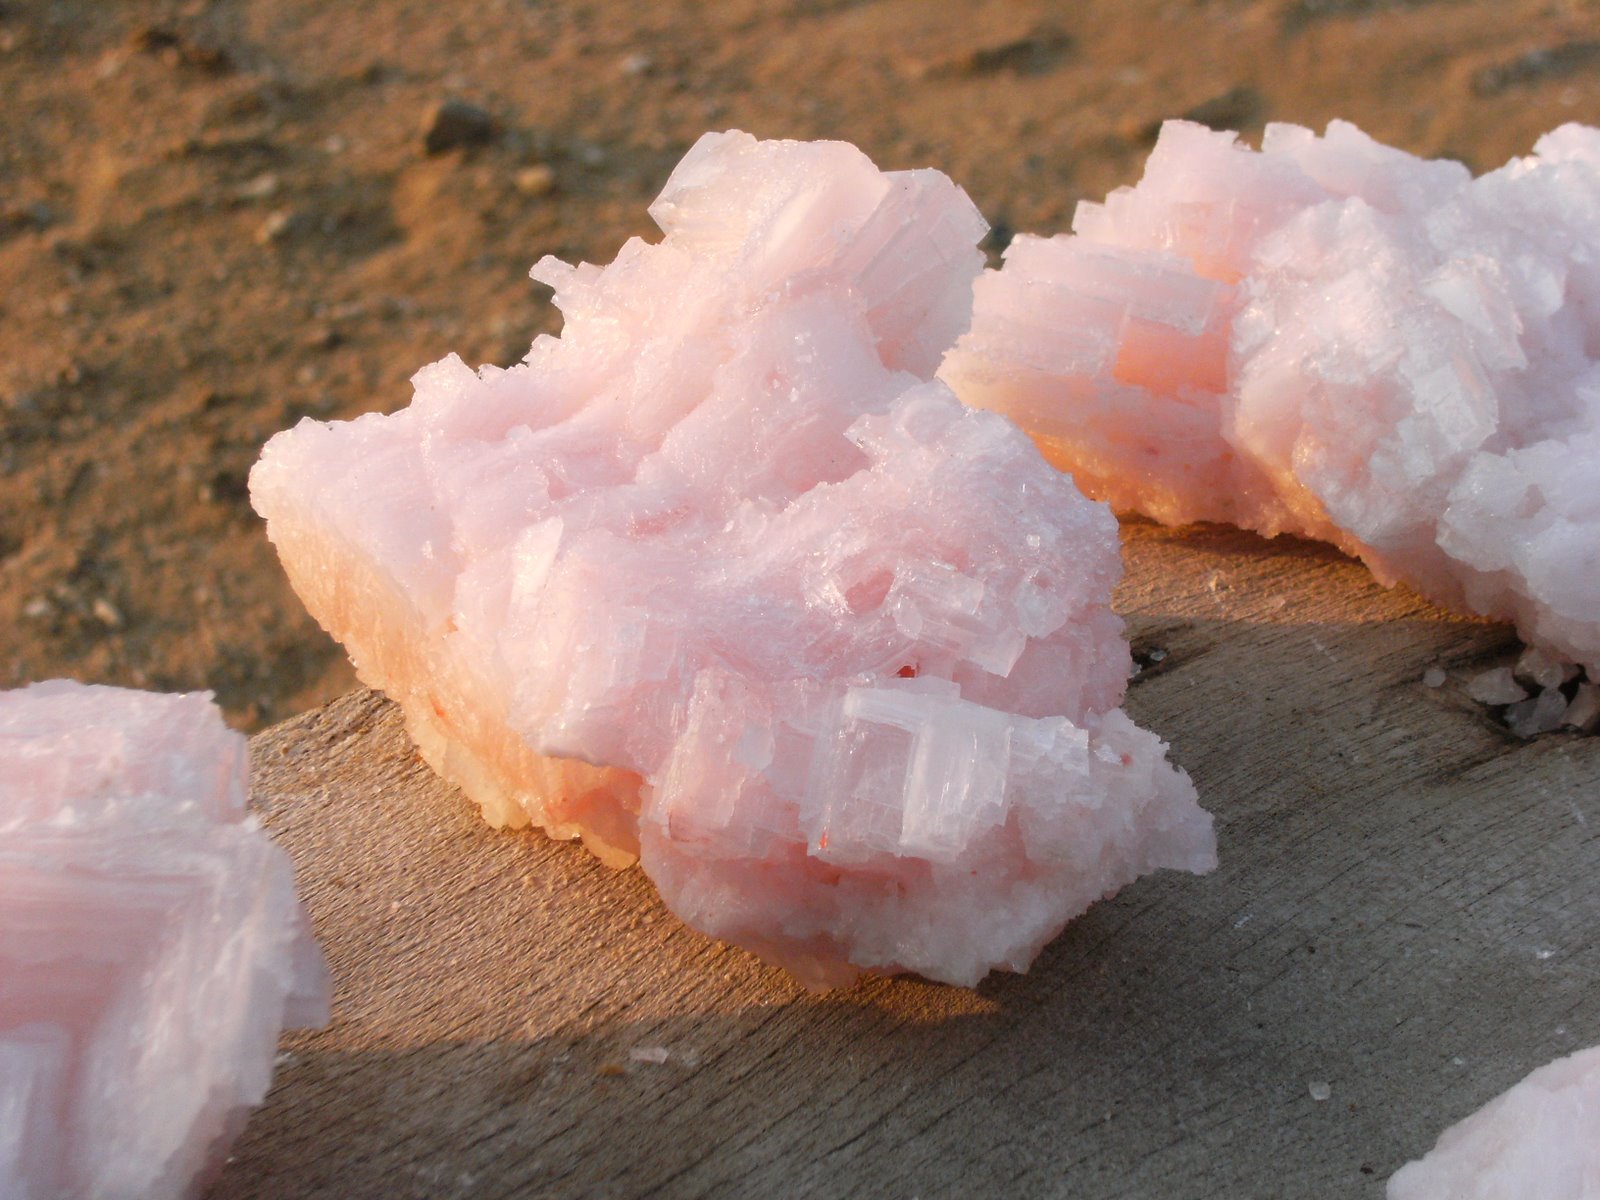
As a base, I recommend using Dead Sea salt. It is very economical and has so many wonderful benefits. This salt, originating in Israel, contains over 21 minerals essential to our bodies and has been known to ease many skin conditions. Another favorite of mine is Himalayan pink salts. The color is simply beautiful and the benefits are well worth the extra price. This healing, skin smoothing salt is said to contain over 80 valuable elements. Plus, it is said to be the purest salt on the market.
Once you have found your base, it is time to decide on scent. I prefer to use pure essential oils to synthetic fragrance oils. The crumb cake bath fragrance might smell heavenly, but we are trying to make something as close to nature as possible. Your body will thank you for steering away from the chemical alternatives. It is important to be aware that not all essential oils are recommended for bath products, so do your homework. Some of my favorites are peppermint, rosemary, lavender, grapefruit and lime. You can create your own unique blends by adding two or more essential oils to your recipe.
Your imagination is the limit when it comes to the creative process of blending your own fragrance.
If you would like to give your bath salts as a gift, I recommend reusing glass jars that you might find around the house. If the lid gives away the clue to the jar’s first purpose, simply paint over it with acrylic paint. Another fun thing to do is layer Dead Sea Salt with Himalayan salt. The colors are beautiful, and the presentation is quite impressive.

Pure and Natural Bath Salts

  • 4 C. salt
  • ½ oz. Pure essential oil
I like to use plastic shoeboxes to mix my bath salt in. Simply pour in your salt base of choice and add your essential oil(s). Blend thoroughly with a stainless spoon and cover with lid.
Note: You might find that you prefer either a lighter or a heavier scent; if so, simply reduce or increase the amount of essential oil you use. Just remember: when the salts dry, the scent will be reduced.
Have fun while creating your own blends and relaxing to the finished product!

http://www.organicsoul.com/make-your-own-pure-and-natural-bath-salts/

ALL ABOUT: Mead Making!!!

Crochet/Knitting Hook Organizer

Here's the link to see more pics of the hook organizer. http://032ad8a.netsolhost.com/madmad/2011/01/31/hook-organizer-markii/#.T1LioYEVGSo
 

Bowling Ball Lady Bugs!

ADORABLE DIY Bowling Ball BUGS are PERFECT for a children's GARDEN! Here's How! ---> http://ow.ly/9svhK ♥♥♥
 

Reusable Crocheted Bandages

http://preppergal11.wordpress.com/2012/03/06/reusable-crocheted-bandages/

Reusable Crocheted Bandages
I’d like to start out by saying this is not my pattern, I lay no claim to it. I got it from @yycbusymom and she got it somewhere else. If it’s your pattern, let me know.
So anyways, the idea is to make a bandage that is durable and reusable in a SHTF scenario. These bandages are easily made and can be boiled or bleached or washed to use again. Obviously there is a concern about blood borne diseases but I wouldn’t be reusing one unless I knew who it was on and what they have/don’t have. So family yes, strangers no, you can keep it, it’s really ok.
To make these bandages you need a 2mm sized crochet hook and #10 cotton crochet thread (both available at Wal-Mart or any craft store).
To start, chain 26 stitches. Turn and single crochet into your last stitch (there by making your bandage 25 stitches long.) Single crochet across your row. At the end, chain one, turn and single crochet into the first stitch.
Continue to single crochet the bandage until the desired length is reached. (You can do several, some 3′, some more. Yycbusymom was going to do some 10′ in case of a chest wound etc.)
When you’re done, tie off like you normally would, roll the bandage and put it into a plastic bag to protect it. (If you’re like me, you’ll have to wash it first, too much stuff gets on it while you’re making it).

Make Your Own Bugsprays...

http://www.comfycountrycreations.com/bugspray.htm

 Comfy Country Creations features a large selection of books for all seasons and occasions.
 
The idea of using rubbing alcohol as a spray for plants pests has been around for years. Can cause leaf damage on African Violets, and Apple trees.

Protection offered:   Alcohol sprays work on aphids, mealybugs, scale insects, thrips and whiteflies. Alcohol sprays have been used successfully on houseplants and tropical foliage plants. Most of these have heavy, waxy cuticles that are not easily burned.
How to Make:
   Use only 70% isopropyl alcohol(rubbing alcohol): mix 1 to 2 cups alcohol per quart of water. Using undiluted alcohol as a spray is very risky for plants. You can also mix up an insecticidal soap spray according to the dilution on the label but substitute alcohol for half of the water required.
How to Use:
  Since alcohol can damage plants always test your spray mix on a few leaves or plants first. Tests results should show up within 2 or 3 days.

Tomatoe Leaf


Make Your Own Bug Sprays


Alcohol Sprays

Nightshade family plants, such as tomatoes, potatoes and tobacco, have toxic compounds called alkaloids in their leaves. These toxins are water soluble and can be soaked from chopped leaves and made into home-made sprays. These sprays also work by attracting natural pest enemies. The good bugs follow the smell of the spray in looking for prey.
Protection Offered:   Tomatoe leaf sprays have been used to protect plants from aphids. Also, spraying tomatoe leaf spray on corn may reduce corn earworm damage. The corn earworm is also called the tomatoe fruitworm, as it also attacks tomatoe plants. A scientific study has shown that corn plants sprayed with tomatoe leaf spray attracted significantly more Trichogramma wasps to parasitize the corn earworm eggs than the unsprayed did.
How to Make:   Soak 1 to 2 cups of chopped or mashed tomatoe leaves in 2 cups of water overnight. Strain through cheescloth or fine mesh, add about 2 more cups of water to the strained liquid, and spray. For aphid control, be sure to thoroughly cover the leaf undersides, especially of lower leaves and growing tips of plants where aphids congregate.
How to Use:   Spray plants thoroughly, particularly undersides of lower leaves and growing tips where aphids congregate. while this spray is not poisonous to humans on contact, use care in handling, especially if you are allergic to the nightshade family.

Garlic Oil Sprays:
Organic gardeners have long been familiar with the repellent or toxic affect of garlic oil on pests. when it is combined with mineral oil and pure soap,as it is in the recipe that follows, devised at the Henry Doubleday Research Association in England, it becomes an effective insecticide. Some studies also suggest that a garlic oil spray has fungicidal properties.
Protection Offered:   Good results, with quick kill, have been noted against aphids, cabbage loopers, earwigs, June bugs, leafhoppers, sqaush bugs and whiteflies. The spray does not appear to harm adult lady beetles, and some gardeners have found that is does'nt work against the Colorado potaoe beetles, grape leaf skeletonizers, grasshoppers, red ants, or sowbugs.
How to Make:   Soak 3 ounces of finely minced garlic cloves in 2 teaspoons of mineral oil for at least 24 hours. Slowly add 1 pint of water that has 1/4 ounce liquid soap or commercial insecticide soap mixed into it. Stir thoroughly and strain into a glass jar for storage. use at a rate of 1 to 2 Tablespoons of mixture to a pint of water. If this is effective, try a more dilute solution in order to use as little as possible.
How to Use:   Spray plants carefully to ensure thorough coverage. To check for possible leaf damage to sensitive ornamentals from the oil and soap in the spray, do a test spray on a few leaces or plants first. If no leaf damage occurs in 2 or 3 days, go ahead and spray more.

Herbal Sprays
Many organic farmers are familiar with using sprays made from aromatic herbs to repel pests from the garden plants. Several recent studies confirm the repellent effect of such sprays. The essential oil of Sage and Thyme and the alcohol extracts such as Hyssop, Rosemary, Sage, Thyme, and White Clover can be used in this manner. They have been shown to reduce the number of eggs laid and the amount of feeding damage to cabbage by caterpillars of Diamond back moths and large white butterflies. Sprays made from Tansy have demonstrated a repellent effect on imported cabbageworm on cabbage, reducing the number of eggs laid on the plants. Teas made from Wormwood or Nasturtiums are reputed to repel aphids from fruit trees, and sprays made from ground or blended Catnip, Chives, Feverfew, Marigolds, or Rue have also been used by gardeners against pests that feed on leaves.
Protection Offered:   Try herbal sprays against any leaf-eating pests and make note of what works for future reference.
How to Make:   In General, herbal sprays are made by mashing or blending 1 to 2 cups of fresh leaves with 2 to 4 cups of water and leaving them to soak overnight. Or you can make a herbal tea by pouring the same amount of boiling water over 2 to 4 cups fresh or 1 to 2 cups dry leaves and leaving them to steep until cool. Strain the water through a cheesecloth before spraying and dilute further with 2 to 4 cups water. Add a very small amount of nondetergent liquid soap (1/4 teaspoon in 1 to 2 quarts of water) to help spray stick to leaves and spread better. You can also buy commercial essential herbal oils and dilute with water to make a spray. Experiment with proportions, starting with a few drops of oil per cup of water.
How to Use:
   Spray plants thoroughly, especially undersides of leaves, and repeat at weekly intervals if neccessary. Go shopping for these herbs.
"Hot" Dusts
Black pepper, chili pepper, dill, ginger, paprika, and red pepper all contain capsaicin, a compound shown to repel insects. Synthetic capsaicin is also available for feild use. Researchers have found that as little as 1/25 ounce of capsaicin sprinkled around an onion plant reduced the number of onion maggot eggs laid around the plant by 75%, compared to a control plant.
Protection Offered:   Capsaicin-containing dusts repel onion maggots from seedlings, as well as other root maggot flies from cabbage family plants and carrots. Pepper dusts around the base of the plants help repel ants, which is desirable in a garden where ants often protect and maintain aphid colonies on plants.
How To Make:   It can be rather expensive to buy enough packaged pepper dusts to sprinkle throughout your garden. However, if you grow and dry your own red peppers, chili peppers, or dill, you can make lots of dust at low cost. Use a mortar and pestle to grind the peppers, or dill, including the seeds, to dust. Be careful handling the hot peppers because they irritate sensitive skin.
How to Use:
   Sprinkle along seeded rows of onions, cabbage, or carrots, in a band at least 6 inches wider than the row or planting bed. A fine sprinkling will suffice, but the more dust you use, the better the effect. Renew after a heavy rain or irragation. To protect plants from ants, sprinkle around the base of plants in an area as wide as the widest leaves.
Pyrethrin The dried, powdered flowers of the pyrethrum daisy, Tanacetum cinerarifolium, were used as early as 1880 to control mosquitoes. The popularity of pyrethrum insecticides waned when synthetic insecticides were introduced, but they are now enjoying a commercial comeback. Many new products formulated with natural pyrethrums are available. Pyrethrins are the insecticidal chemicals extracted from the pyrethrum daisy. Do not confuse them with pyrethroids, the term for a new class of synthetic pesticides. Pyrethrums, which are mainly concentrated in the seeds of the flower head, are a contact insecticide, meaning the insect only has to touch the substance to be affected. Pyrthrins have a quick knockdown effect on insects: Flying insects are paralyzed. pyrethrins can be applied up to one day before harvest because they are quickly destroyed by light and heat and are not persistent in the environment. Pyrthrins will kill lady beetes but do not appear to be harmful to bees. They are toxic to fish and to the aqautic insects and other small animals that fish eat. Pyrethrins do not seem to be toxic to birds or mammals.
Protection Offered:   Pyrethrins are registered for flowers, fruits, and vegetables, including greenhouse crops. they are effective on many chewing and sucking insects, including most aphids, cabbage loopers, celery leaftiers, codling moth, Colarado potaotoe beetles, leafhoppers, Mexican bean beetles, spider mites, stink bugs, several species of thrips, tomato pinworms, and whiteflies. they are especially good against flies, gnats, mosquitoes, and stored products pests. Flea beetles are not affected, nor are imported cabbageworms, diamondback moths, pear psylla, and tarnished plant bugs.
How to Make:   If you grow your own pyrethrum daisies, you'll have the main ingredient for a make-it-yourself spray. The concentration of pyrethrums is at its peak when the flowers are in full bloom, from the time the first row of florets open on the central disk opens too the time all the florets are open. pick flowers in full bloom and hang them in a sheltered, dark spot to dry. Once the flowers have dried thoroughly, grind them to afine powder, using a mortar and pestle, old blender or small hammer mill. Mix with water and add a few drops of liquid soap. Store in a glass jar and keep the lid tightly closed, because the mixture looses activity if left open. You'll have to experiment with the amount of water to add, because the concentration of pyrethins in the flowers is an unknown variable. If the spray you make does not seem to kill insects, use less water the next time you make the concentrated spray. Also keep in mind whole flower heads stay potent longer so do not grind until ready to use.
How to Use:
   Pyrethrins are more effective at lower temperatures, so for best results, apply in early evening when temperatures are lower. Spray both the upper and lower surfaces of the leaves, because spray must directly contact the insects such as thrips that hide in leaf sheaths and crevices. The first spray will excite them and bring them out of hiding, the second will kill them. Never use pyrethrin products around waterways and ponds.

Nicotine
One of the top three insecticides in the 1880s, nicotine in several forms is still widely used. Nicotine comes from the tobacco plant and is extremely toxic to insects. The great advantage of home-made nicotine tea is that it is very short ived, retaining its toxicity for only a few hours after spraying. It is relatively nonhazardous to bees and lady beetles because of its short persistence.
Protection Offered:   Nicotine is effective against ground and soil pests, especially root aphids and fungus gnats, and on many leaf-chewing insects, such as aphids, immature scales, leafhoppers, thrips, leafminers, pear psylla, and asparagus beetle larvae.
How To Make:   You can brew your own batch of nicotine tea by soaking tobacco leaves or cigarette butts in water to make a spray. Soak 1 cup of dried, crushed tobacco leaves, or an equivalent amount of cigarette butts, in one gallon of warm water with 1/4 teaspoon pure soap added. Strain the mixture through cheesecloth after it has soaked for 1/2 hour. The solution will keep for several weeks if stored in a tightly closed container.
How to Use:
   For soil pests, pour the spray mixture onto the soil in the area of the stem base and root zone. for leaf pests, spray leaves thoroughly, especially the undersides. Nicotine can be absorbed by plant leaves and remain there for several weeks. to be safe, use nicotine only on young plants and only up to one month before harvest. It's probably safest not to spray nicotine on eggplant, peppers or tomatoes. While most tobacco cultivars now grown are resistant to tobacco mosaic virus, nicotine sprays could contain the pathogen, which will infect nightshade family crops.
Resources: Rodale's Chemical-Free Yard and Garden

75 Extraordinary Uses for Baking Soda

http://lifehackery.com/2008/07/22/home-4/


Baking soda is a chemical compound that appears as a fine powder. It releases bubbles of carbon dioxide when it interacts with an acid and a liquid. It’s most commonly used in baking, where it acts as a leavening agent. The following are 75 other uses for baking soda aside from making muffins soft and fluffy.
Health Uses
1. Use it as an antacid.
2. Use it as underarm deodorant by applying it with a powder puff.

deodorant
3. Mix half a teaspoon with peroxide paste and use it as toothpaste.
4. Use it as a face and body scrub.
5. Add a cup to bathwater to soften your skin.
6. Relieve skin itch from insect bites and pain from sunburn.
7. Remove strong odors from your hands by rubbing them with baking soda and water.
8. Put two tablespoons in your baby’s bathwater to help relieve diaper rash.
9. Apply it on rashes, insect bites, and poison ivy irritations.
10. Take a baking soda bath to relieve skin irritations.
11. Heartburn? Take a teaspoon of baking soda mixed with one-half glass of water.
12. Freshen your mouth by gargling half a teaspoon of baking soda mixed water.
gargling
13. Relieve canker sore pain by using it as mouthwash.
14. Use it to relieve bee stings.
15. Use it to relieve windburns.
16. Apply it on jellyfish sting to draw out the venom.
17. Unblock stuffy nose by adding a teaspoon of baking soda to your vaporizer.
In the Home
flower vase
18. Keep cut flowers fresh longer by adding a teaspoon to the water in the vase.
19. Put out small fires on rugs, upholstery, clothing, and wood.
20. Put an open container of baking soda in the fridge to absorb the odors.
21. Sprinkle it on your ashtrays to reduce bad odor and prevent smoldering.
22. Sprinkle it on your slippers, boots, shoes, and socks to eliminate foul odor.
23. Turn baking soda into modeling clay by combining it with one and 1/4 cups of water and one cup of cornstarch.
24. After feeding your baby, wipe his shirt with a moist cloth sprinkled with baking soda to remove the odor.
25. Wipe your windshield with it to repel rain.
26. Improve the smell of dishrags by soaking them in baking soda and water.
27. Suck it in with your vacuum cleaner to remove the odor.
28. Freshen the air by mixing baking soda with your favorite perfumed bath salts. Put the mixture in small sachet bags.
29. Restore stiff brushes by boiling them in a solution of 1/2 gallon of water, 1/4 cup of vinegar, and a cup of baking soda.
30. Put it under sinks and along basement windows to repel cockroaches and ants.
31. Scatter baking soda around flowerbeds to prevent rabbits from eating your veggies.
32. Sweeten your tomatoes by sprinkling baking soda on the soil around your tomato plants.
33. Sprinkle it onto your cat’s litter box to absorb the bad odor.
34. Sprinkle it on your pet’s comb or brush to deodorize their fur and skin.
In Cooking
35. Use it as a substitute for baking powder by mixing with it with cream of tartar or vinegar.
36. Wash fruits and vegetables with it.
washing vegetables
37. When boiling a chicken, add a teaspoon of baking soda to the water. Feathers will come off easier, and the flesh will be clean and white.
38. Soak dried beans to a baking soda solution to make them more digestible.
39. Remove the distinctive taste of wild game by soaking it in a baking soda solution.
40. Make a sports drink by mixing it with boiled water, salt, and Kool-Aid.
41. Remove the fishy smell from your fillets by soaking the raw fish in a baking soda solution for an hour inside the fridge.
42. Make fluffier omelets by adding half a teaspoon of baking soda for every three eggs used.
omelet
43. Reduce the acid content of your tomato-based recipes by sprinkling them with a pinch of baking soda.
Cleaning Purposes
44. Add a cup to the toilet, leave it for an hour, and then flush. It will clean the toilet and absorb the odor.
flushing toilet
45. Use it to scrub sinks, showers, plastic and porcelain tubs
46. Spray it on walls, mirrors, and countertops.
47. Add a spoonful to your dishwasher to make scrubbing dishes easier.
48. Remove grease from pots and pans.
49. Dry clean carpets and upholstered furniture by sprinkling baking soda over the fabric and gently brushing it. Leave it for an hour or overnight, then vacuum.
50. Boost your laundry detergent’s cleaning power by sprinkling a handful on dirty clothes.
51. Combine it with water to make a paste for polishing stainless steel and chrome.
52. Remove scratches and crayon marks from vinyl floors and walls.
53. Clean your shoes with it.
cleaning shoes
54. Clean garbage cans with it.
55. Use it to wash diapers.
56. Clean the fridge with it.
57. Soak brushes and combs in a baking soda solution.
58. Mix it with water to wash food and drink containers.
59. Put three tablespoons of baking soda to a quart of warm water, then use the mixture to wash marble-topped furniture.
60. Absorb it with a damp sponge, then clean Formica countertops with the sponge.
61. Use it to get rid of stale odors from cooling containers and thermos bottles.
62. Run your coffee maker with a baking soda solution, then rinse.
63. Combine with hot water to clean baby bottles.
64. Sprinkle it on barbecue grills, then rinse it off.
65. Scatter it on your greasy garage floor, scrub the floor, and rinse.
66. Remove burned-on food from a pan by soaking it in a baking soda solution for 10 minutes before washing.
67. Clean your ashtrays with a baking soda solution.
68. Keep your drains clean by putting four tablespoons of baking soda in them each week. Flush it down with hot water.
69. Clean your shower curtains by soaking them in baking soda and water.
70. Put it on a small brush to rub canvas handbags clean.
71. Use it to remove melted plastic bread wrapper from a toaster. Sprinkle baking soda on a damp rug, then use the rug to clean the toaster.
72. Use it to clean your retainers and dentures.
cleaning dentures
73. Make a thick paste of baking soda and water, and used it to scrub enameled cast iron and stainless steel.
74. Mix four tablespoons of baking soda with a quart of warm water, and use it to clean the inside part of an oven.
75. Use it to unclog gas stoves.
The most amazing thing about baking soda is that it’s very cheap. You can do all these things for a very small cost. Baking soda is truly a miracle product, whether it’s used for baking or not.

3 Fancy Butter Recipes...

http://abeautifulmess.typepad.com/my_weblog/2012/02/3-fancy-butter-recipes.html
3 Fancy Butter Recipes

Fancy butterHere's an easy and delicious idea to make, what I like to call, fancy butters! Fancy butters, or compound butters (as they are more commonly called) are butters that have been infused with other flavors. My great aunt always used to make honey butter for Thanksgiving and it was one of my all time favorite holiday treats! I love how you can package these butters and then gift them to dinner party guests.


How to make compound butters
Fancy butters are super easy to make! All you need is softened (but not melted) butter and your mix-in ingredients. To soften butter either leave it out on the kitchen counter for a few hours or you can soften it in the microwave on low heat for 20 seconds or so. Once the butter is softened add your ingredients and stir-that's it! You can package these in small jars or in wax paper in a square container in the refrigerator overnight.


Honey butterHoney Nut Butter: Mix together two sticks of butter, 2-3 tablespoons of chopped nuts (I used pecans) and 3-4 tablespoons honey. This butter is great on an English muffin for breakfast or Thanksgiving dinner rolls!


Citrus butter
Citrus Butter: Mix together two sticks of butter and the zest of 1 lemon and 1 lime. This butter is great on fish or sauteed veggies (like Brussels sprouts-my favorite!).


Raspberry butter
Raspberry Butter: Mix together two sticks of butter and 4-5 tablespoons of raspberry jam. This butter is excellent on an afternoon toast with tea!

Followers