Family Farm

Family Farm
Showing posts with label Spring. Show all posts

Sunday, March 11, 2012

Dying Easter Eggs...Naturally

http://fresh-eggs-daily.blogspot.com/2012/03/dying-easter-eggsnaturally.html

Dying Easter Eggs...Naturally


It's almost Easter.  And Easter means colored eggs.  Of course if you have some colored egg-laying chickens, you don't need to worry about dying eggs for Easter, but since this is our first spring having white duck eggs, I wanted to try some.  I decided to experiment with natural ingredients for the dyes instead of using either food coloring or Kool-aid.

Its was so easy and the results were glorious as you can see !  

Here's the method that I used and then some suggestions for ingredients to use to achieve an assortment of beautifully dyed eggs.  The beauty of this method is that you hard boil and color the eggs in one step.
I started with a bowl of white duck eggs (although you can use white chicken or goose eggs also) and rinsed them in warm water, scrubbing gently to remove the bloom.  

Then I placed a few eggs in a small pot in a single layer and covered them with water, adding 1 Tablespoon white vinegar per Cup of water, along with whatever I was using as coloring agent, brought the mixture to a boil and then simmered for 15-20 minutes, checking the color intensity after 10 minutes.
~eggs simmering in onion skins~

~eggs simmering in beets/stalks~

When I had achieved the desired color, I removed the eggs gently and placed them in a plastic egg carton to dry.  I poured the remaining water mixture (except the onions,coffee grounds and wine) into a large bowl to give to the chickens when I was done.  

When the eggs were dry, I rubbed each with a cotton ball dipped in cooking oil and then buffed gently with a clean paper towel to give them a beautiful shine.
 

These are the colors I got from various common food items:

CRANBERRY JUICE/CRANBERRIES ~ PINK
I didn't use any water, but instead covered the eggs with the cranberry juice (fresh or frozen cranberries would also work - I just didn't happen to have any) and added 1T white vinegar per Cup of juice to get a nice rosy pink.

BEETS & STALKS ~ BEIGE
I added two sliced fresh beets and stalks to enough water to cover the eggs (canned beets would also work)  for a beige color.

ONION SKINS ~ ORANGE
Onion skins produced an orangish color. One egg came out after about 10 minutes, the others I left in for 20 minutes for a contrast in colors. (I discarded the skins when I was done)

TURMERIC~YELLOW
I added a few Tablespoons of turmeric to the water and white vinegar for cheery yellow eggs.

SPINACH~GREEN
A handful of fresh spinach leaves added to the water/vinegar produced pale green eggs.

BLUEBERRIES~BLUE
Fresh blueberries, mashed and added to the water and vinegar produced gorgeous blue eggs.

RED WINE ~PURPLE
Again, no water, just boiled the eggs in wine and added 1T white vinegar per Cup of wine
(the wine I discarded when I was done) and got a pretty purplish color.

COFFEE~TAN/BROWN
I brewed a pot of strong coffee, putting the eggs right into the carafe while the coffee was brewing, and then leaving them to steep for 10 minutes for the lighter tan and 20 minutes for the darker color. I discarded the coffee when I was done.

I ended up with a beautiful assortment of naturally dyed eggs ...

and the chickens got a nice fruit and veggie soup mix to enjoy.

Try these ideas or others - such as pomagranites, carrots, or other types of greens.

Happy Easter ...

from the Ducks !
~stock photo~

You can also use blown eggs so they will last indefinitely.


Spring Cleaning: A Complete Checklist

http://housekeeping.about.com/cs/cleaning101/a/springclnngguid.htm


The flowers are blooming, the birds are serenading, and our house still feels like it's stuck with winter blues. Spring cleaning is a tradition that allows us to freshen up our homes and get a head start on the hectic seasons of spring and summer. What do you need help spring cleaning?
Spring Cleaning Checklists By Room
These tutorials help with spring cleaning for any room. Each tutorial gives a list of steps, tools and supplies needed, and tips to help you get the job done.
Clearing Clutter and Organizing During Spring Cleaning
One of the biggest parts of spring cleaning is getting rid of clutter that you don't need. Use these resources to clear out your stuff. Cleaning will be a lot easier if the clutter is gone.
Getting the Family Involved in Spring Cleaning
If you need a little help in your spring cleaning endeavors, try to get your family involved. Even the most unwilling helper can make a big difference in the work load.
Extra Spring Cleaning Chores
There are some spring cleaning chores that need to be done seasonally. Even though these chores only need to be done once or twice a year, they will help your home run look better and run smoothly.
Products to Use During Spring Cleaning
The cleaning aisles of our stores are stocked full of supplies to help you clean. Find out what supplies you need and which ones you don't.
Maintaining the Spring Cleaning
If you want some ideas to help you maintain the spring cleaning around your home our 15 minute cleanups can keep that spring cleaning feeling around for a long time.

Mason Bees

http://www.themorristribe.com/2012/03/04/mason-bees/

The shortage of honey bees due to parasitic mites and mystery diseases is a real threat to the health of our crops!
We need these precious pollinators to grow food….mason bees to the rescue!
I’ve been unfamiliar with mason bees until lately, but as story after story of “colony collapse” come across my desk, I am concerned about proper pollination of my growing orchard and vineyard.
Mason bees, or Osmia lignaria, are orchard bees.  Ailments that have destroyed many a honey bee hive have not affected the mason bees to this point, perhaps because the mason bees are native to America.
Honeybees were introduced to America by the Europeans about 400 years ago.
While Mason bees do not produce honey, they bring many other valuable benefits to the table.  Once again, they are wonderful pollinators.  Mason bees continue to be active in colder weather and their hairy bodies carry more of the pollen that fertilizes your blossoms.
Mason bees are also a gentle bee who won’t ever chase or sting you, unless severely provoked.  I feel good about that with all the children running around the yard all summer.

Attracting Mason Bees

Mason bees build their mud sealed nests in natural tubes like reeds or holes in dead trees in the wild.  Sometimes they make their homes between wood shingles on houses and barns. (They do no damage – they just build their mud homes in sheltered cracks.)
Currently, extension research by the USDA has proved that the mason bee task is made much easier if we provide  6″ paper-lined tubes 5/16″ in diameter, that are somewhat weatherproof and contained in a protective shelter.
By using smooth tubes, we allow the female Mason bee to channel her extra time and energy into laying more eggs.
I purchased the above mason bee hive from Miller Nurseries and placed them at each end of my garden/orchard area.

The Mason Bee Life Cycle

Those mud sealed tubes contain the entire future population of Masons, males and females.    All of last year’s adults have completed their lives by the end of the previous Spring.
Each 6″ tube contains 6 or 7 separate compartments, each with one egg and a food store pellet of pollen and nectar.  In summer, the eggs hatch and the grubs feed.  By September, they mature into adult bees that stay in their home of mud until the blossoms come forth the following Spring.
I’m excited about the potential of these pollinating helpers, and it’s pretty inexpensive to purchase a few nests or even make your own replacement nests.  Purchasing the bees themselves is another option as you can grow a colony in just a few years!

A List of 5 Essential Medicinal Herbs for Spring

http://frugallysustainable.com/2012/03/a-list-of-5-essential-medicinal-herbs-for-spring/

Every breath is a giveaway dance
between you and the plants.”
~Susun Weed
So if you’ve been reading Frugally Sustainable for any length of time, you’ve probably noticed that I am borderline obsessed with herbs :) I love them for several reasons – they come from the Earth, they’ve healed for thousands of years, and they are amazing! And now with Spring on the way, it’s time to start thinking toward the days ahead. 
Preparedness is the name of the game when working with herbs, and as we prepare for warmer days – and an increase in the time spent outdoors – we can certainly anticipate many opportunities to care for bruises, cuts, scrapes, a variety of rashes, and bug bites.
Therefore, rather than relying on the commercially-prepared products that line the shelves of the local pharmacy…let’s take a look at some plants!
5 Essential Medicinal Herbs for Spring
Talk to 10 different herbalists about the most “essential” herbs to keep in stock and you’ll get 10 different answers. Medicinal herbs are just like that…everyone has there favorites. Here are mine :)

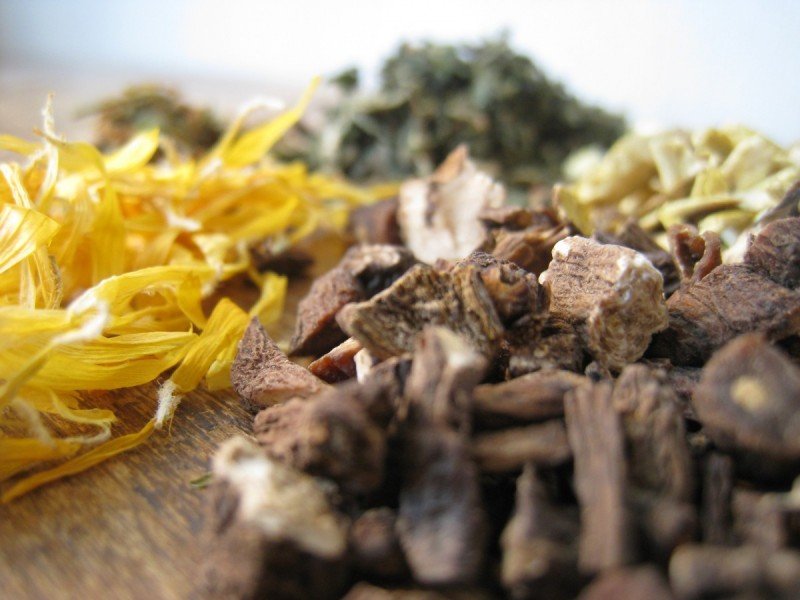
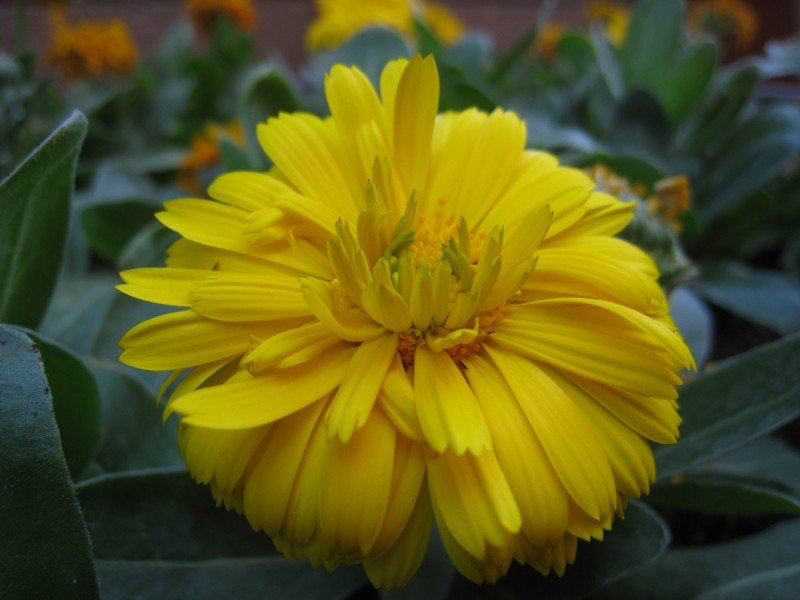
  1. CalendulaThis is one of the best herbs to use when attempting to treat ailments of the skin – such as cuts, burns, inflammation, bruises, minor open wounds, scrapes. Phytochemicals that are present in this flower work hard against bacteria, viruses, and fungi. Because of these potent properties, calendula can be used to treat and soothe sun-burned skin, ear infections, pink eye, diaper rash, bug bites, eczema, and acne. Interested in learning how to make a calendula infused oil? Read more here. And click here to learn how to make your own salve!
  2. Nettle LeafNettle leaf contains an abundance of natural antihistamines and touts many anti-inflammatory properties as well. Therefore, it is super effective in treating all of the symptoms associated with seasonal allergies — i.e. a runny nose, itchy, watery eyes, and sneezing. Nettle leaf is also high in essential vitamins and minerals. The best ways to ingest the goodness of this herb are through an herbal tea infusion or tincture.
  3. Dandelion RootYes I am referring to the little yellow flower that grows like crazy in our yards come Spring! The flower, leaves, and roots are each beneficial and work in different ways. The root of the plant is incredible when used as a liver and gallbladder detoxifier. Additionally, it is rich in a variety of vitamins and minerals. Used in tinctures and teas, this herb will detox, nourish, and revive the body after a long winter…it is the perfect Spring Tonic.
  4. St. John’s WortThe “feel good” herb, known for it’s ability to effectively treat the symptoms of mild depression, can also be used to treat neurological pain, tension, anxiety, and irritability when taken internally. Moreover, when St. John’s wort is used externally it is wonderful in homemade salves for the treatment of bruises, wounds, and especially good for treating sunburn.  
  5. Oregon Grape RootI love Oregon grape root! It’s broad-spectrum properties – anti-bacterial, anti-fungal, antibiotic, and anti-viral — make it a must-have for my herbal medicine chest. Use it in salves or as a poultice to more aggressively treat athlete’s foot, psoriasis, eczema, and acne. 
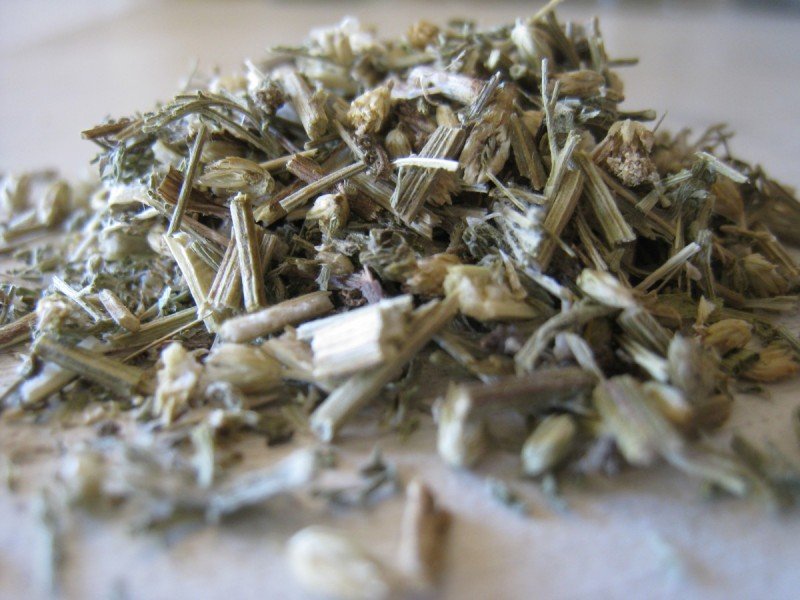
Bonus Herb: YarrowI had to include just one more :) Yarrow is great when used as a treatment for the flu and sudden fevers. One would be wise to always have yarrow on hand. A tea made from yarrow, although bitter (I make it yummy tasting for the children by adding peppermint leaf), will stop a cold and reduce a fever super quick! This is my fever-reducer of choice.

Notes
-An additional bonus to these herbs is their ability to grow in most climates and soils. During the later months of Spring and early Summer, these are herbs/weeds are easy to find growing on the side of the road or in our lawns…and they can be grown without difficulty in the backyard herbal garden.
-Want to learn more about medicinal herbs? These are just a few of the resources that have shaped my thinking regarding this practice:

Spring Cleaning Tips


We all love spring for its fresh and cozy weather. The chirping of birds, flourishing of flowers, refreshing fragrance fills our heart with peace and joy. But to enjoy that feeling, we have to spend some time on cleanliness and hygiene, to make your house get freshen up and get a head start on the seasons of spring and summer. Our superb and easy to use springs cleaning tip will help you make your house keeping workload not felt at all. You will get to know how to clean anything you have at home and I hope you will enjoy browsing our tips.
Let’s get started; Are the walls dirty?  Just follow these simple:

Tips for cleaning walls:

For cleaning interior walls you would need Wall cleaner, mix 1/2 c. ammonia, 1/4 c. white vinegar, and 1/4 c. baking soda to 1 gal. warm water. If you have a textured walls use nylon socks instead of a sponge or cloth to avoid leaving material chunks behind. You can tie a dust cloth over your broom and work from the top down, to dust wall paper. If you have naughty kids, who have filled non-washable papers with pencil marks and drawings with other non-greasy spots, use an art-gum eraser t remove that. You can also remove remove greasy spots or crayon by applying a paste of cleaning fluid and fuller’s earth and cornstarch. Let the wall dry and brush off residue. Repeat the treatment until the spot is gone.
For exterior walls Use a water hose to spray the outside of your house. This will remove siding cobwebs and dirt.
If you have textured siding, attach a car-washing brush to the hose to remove dirt.
Tips to Clean Windows:
You can make your own spray cleaner. Its easy.  Fill a spray bottle with 3 tablespoons ammonia, 1 tablespoon vinegar & the remainder with water. After that Dust blinds by wrapping a cloth around a ruler. Spray cloth with a dusting spray and run the flat end across each blind. After that shine the windows using an old newspaper. To avoid streaks, clean windows on an average temperature, preferably on a cloudy day. Dry windows outside in one direction then inside in the other direction so that If you see a streak, you will know which side is the mistake. To clean window sills, pour diluted rubbing alcohol on a cloth and rub the entire surface. Then dust off the sill with a clean cloth.
Tips to clean Bathroom:

If the bathroom mirror is not clean, to remove the dull haze, rub alcohol on the surface. Rubbing alcohol can remove the dull haze from mirrors. Rubbing alcohols also removes spots from bathroom fixtures. But for having a sparkling Glass shower doors, clean it with white vinegar. If the shower is dirty then use a solution of 1/2 cup vinegar, 1 cup ammonia, and 1/4 cup baking soda added to one gallon of warm water to clean it.
Water spots on metal frames are a great pain in the bathroom. To clean those use the Lemon furniture oil.
Rusty tile marks can be removed with kerosene. Running the shower on hot for five minutes will steam the dirt loose. To clean Grout Wash with 2 tablespoons chlorine bleach in one quart of water. Dry thoroughly, and then apply Several coats of lemon oil. Let dry one hour between coats. Dull walls will shine when washed with vinegar and water and polished with a dry cloth. Lighter fluid will remove most stains from porcelain sinks and bathtubs.
How to keep your kitchen clean:
Remove stubborn water spots from a stainless sink with a cloth dampened with rubbing alcohol. These spots can be removed with vinegar. If the stainless steel is rusty then rub stainless steel sinks with lighter fluid. For a sparkling white porcelain sink, place paper towels across the bottom of your sink and saturate with house hold bleach.  Let it rinse for 8 hour. Be careful and donot use bleach in colored sinks.
To fight with refrigerator odor keep an open box of baking soda. It will absorb odors for a month or so. Can also use a few drops vanilla extract on a piece of cotton placed in the refrigerator. This will eliminate odors.
Wipe refrigerator with vinegar to prevent mildew and Use your vacuum on the front of the coils and motor to remove dust and dirt from the refrigerator.
Appliances Care:

Yellowing of white appliances is a perennial problem. To stop that mix 1/2 cup bleach, 1/4 cup baking soda and 4 cups of warm water. Apply with a sponge & keep for 10 minutes. After that rinse & dry thoroughly. You can also use car wax to wax large appliances and make them shine. You can also use it to remove small scratches as well.
Wood Floors:

You can make your own floor cleaner. It is very easy to make. Make a solution of 1/2 cup of white vinegar in 1 gallon of warm water. Damp mop with a mop squeezed nearly dry. It is safer to mist the mop with the cleaner than to apply to floor. Do a section at a time and throw an old towel on the floor and scoot back and forth with foot to dry and prevent streaks. Standing liquid from mopping, spills, and pet accidents can damage floors.
The greatest damage done to wood floors is from grit. Mats at doors are necessary to collect grit and it’s important to keep these clean. Frequent dust mopping in high traffic areas to collect grit is the best prevention. This should be done based on the amount of traffic, which may require dust mopping several times a day in an active household. The brush attachment of a vacuum can be used (no beater bars). Felt and furniture protectors should be installed on furniture. Never scoot furniture on wood. Put a piece of waxed paper under your dust mop. Dirt will stick to the mop and the wax will shine your floors.
Removing Stains

Stains are our greatest enemies and to fight them is even easier if you are prepared.
Water Stains: Rub the spot with No. 2 steel wood and rewax. For more serious water stains, lightly sand with fine
Sand paper, clean the spot with No. 1 or 00 steel wool and mineral spirits or floor cleaner then refinish and wax.
Cigarette Burns: If not severe, the burn can be removed by rubbing with steel wool moistened with soap and
water.
Heel and Caster Marks: Rub vigorously with fine steel wool and floor cleaner. Wipe dry and polish.
Ink Stains and Other Dark Spots: Use No. 2 steel wool and floor cleaner to clean the spot and surrounding area.
Thoroughly wash the affected area. If the spot remains, sand with fine sandpaper, re-wax and polish. Stubborn
stains may require that you replace the affected area.
Chewing Gum and Wax Deposits: Ice until the deposit is brittle and crumbles off. Pour floor cleaner around the
stain so the fluid soaks under and loosens it.
Alcohol Spots: Rub the spot with liquid or paste wax
Tips to keep Carpets Clean:

To clean dry spots, loosen soil and vacuum away prior to moistening it. When taking out stains, always use a white cloth. If you have dropped Wax  on carpet or upholstery and want to clean it then set a clean, absorbent cloth over the wax stain and hold a hot iron on it. Then remove the cloth. Coat mildly greasy stains with aerosol shaving cream, use a hair dryer to speed dry. Then vacuum. Sprinkle a greasy stain with baking soda, cornstarch or talcum powder. Leave on at least 8 hours, and then vacuum. The works done.
Apply these simple and effective tips and have a happy spring!!

How to color Easter Eggs with natural dyes.

Easter eggs
These beautiful Easter eggs are colored with dyes made from beets, onions and blueberries.
ROSALIND CREASY
 
When Alex, my 10-year-old grandson, came to stay with me during spring break, he was eager to color Easter eggs. Also, I hadn’t seen Jody Main, my friend and an Easter egg maven, for far too long — what a perfect excuse for a visit!
Dyeing and Decorating Tips
Follow the recipes below to make the dyes, using individual stainless steel, glass or enamel saucepans for each color. Combine the ingredients and boil each color mixture separately for 15 minutes before dyeing eggs. The vinegar acts as a fixative — without it, the dyes won’t stick to the eggs.
  • Before dyeing, hard boil white eggs and let them cool.
  • For uniform color, strain each dye mixture through cheesecloth or a fine strainer.
  • For a mottled, tie-dyed or spotty effect, leave all the ingredients in the pans.
  • Use crayons to make designs — circles, geometrics, your name — on the egg; the crayoned part will not take up any dye. White crayons work especially well.
  • The longer the eggs remain in the dye, the deeper the color.
  • For special effects, dip half the egg in one color, the other half in another.
Coloring Easter eggs with natural dyes was a fabulous way to teach Alex about colors. When he went home, I sent along the ingredients he’d need so he could share his experience with his friends and parents. Happy Easter!

Recipes for Natural Dyes for Easter Eggs

RED
2 cups beets, grated
1 tbsp white vinegar
2 cups water
Substitute: strong Red Zinger tea, or chopped fresh or frozen cranberries

YELLOW TO GOLD
3 large handfuls of yellow/brown onionskins
1 tbsp white vinegar
3 cups water
Substitute: strong chamomile tea, or 2 to 3 tbsp ground turmeric

BLUE
1 pound frozen blueberries, crushed
1 tbsp white vinegar
2 cups water
Substitute: red cabbage leaves, coarsely chopped, create lavender

OTHER COLORS
Mix combinations of the primary dyes (in separate cups) to make secondary colors: red and yellow for orange, yellow and blue for green, and blue and red for violet. The proportion of one color to the other determines the shade.
Rosalind Creasy
Los Altos, California


Read more: http://www.motherearthnews.com/Do-It-Yourself/How-To-Color-Easter-Eggs-Natural-Dyes.aspx?page=2#ixzz1oq96rA8m

Read more: http://www.motherearthnews.com/Do-It-Yourself/How-To-Color-Easter-Eggs-Natural-Dyes.aspx?page=2#ixzz1oq8vXJJj


Read more: http://www.motherearthnews.com/Do-It-Yourself/How-To-Color-Easter-Eggs-Natural-Dyes.aspx#ixzz1oq8YFVV7
 

RELATED CONTENT

When we entered Jody’s farmhouse kitchen, there was a table with teacups full of dyes and a big bowl of eggs ready to go. Alex and I had great fun, and we learned a lot that afternoon about colors and which combinations produce which colors. We went home with cartons full of unique eggs.
After years of dyeing eggs using a wide range of botanical sources, Jody had streamlined the dyeing procedure. She had narrowed the necessary ingredients down to three — fresh red beets, yellow onionskins and frozen blueberries. That’s all she needed to produce the primary colors: red, yellow and blue. By combining the resulting dyes in varying amounts, she can create any color of the rainbow. You can do it, too!

Followers