Family Farm

Family Farm
Showing posts with label Cleaner. Show all posts

Tuesday, March 13, 2012

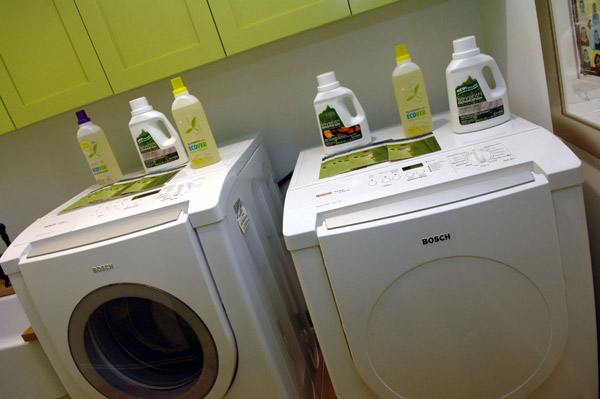
4 Tips for Greener, Cleaner Laundry

http://www.organicsoul.com/4-tips-for-greener-cleaner-laundry/
Green LaunndryFor some people, transitioning to a sustainable lifestyle is something you do step by step. Though we should, not all of us have achieved that bottom line level of efficient, low-waste living.
Not all hope is lost, though: we can each still be working toward a more natural, sustainable lifestyle every day. Instantly jumping to carbon neutral may be impossible, but working toward that goal is something we can start right now.
So let’s visit the laundry room.
It is in there that you’re going through hundreds of gallons of water, tons of electricity, waste and plastic, and time. Laundry is awfully demanding. Despite that, if you’re looking to green this practice and save a few dollars, check out these four simple tips:

Number 1. Wash in Cold

First up, wash your clothes in cold! Many people are concerned about the efficacy of washing when it’s in cold but rest assured, washing your clothes in cold is just as effective as washing your clothes in warm water. Unless you are trying to get out grease, heavy oil, or tough stains, then there should be no problem (and you should probably work on those individually anyways!).
On top of working just as well, washing in cold is also great from the environment. Check this out: washing in cold water for a year equals the same carbon emissions as 164 miles of driving while washing in hot can emit as much as 3595 miles of driving, depending on your rig. That’s a notable difference.
Finally, washing in cold means less energy used. This means an electric bill with fewer dollar signs. Good for the planet, good for you – good idea.

Number 2. Wash when Full

Next up, be sure to wash when you have a full load. This should, by all means, go without saying – why waste resources? Washing when full means washing less often, reducing time spent on loads, and means more efficient use of detergents and cleaners. Fill up those washers and save those dollars!

Number 3. Wash with Health in Mind

While we’re on the subject of cleaners, be sure to choose the right ones! Being green doesn’t just mean you need to efficiently use your resources like water and electricity. It also means you need to be mindful of what you’re putting back into the environment. Unfortunately, many of the detergents and cleaners on the shelves might not have what Mother Earth deems “healthy.”
Bottom line: keep your eyes peeled for surfactant nonylphenol ethoxylate (also known as NPE), phosphates, and harsh bleaches. Instead, go for brands that use natural alternatives, no dyes or fragrances, and nothing harsh for your skin.

Number 4. Low Heat or No Heat – Use the World!

Finally, when it comes to drying, you want to minimize the time spend using your actual dryer. Why? Dryers require a ton of energy, adding a chunk to the CO2 emitted by your washer. The funny this is that you often do not even need a dryer! Plan your washes around the schedule of the sun – by doing that, you can string your clothes up and let the natural warmth from our star do the drying. This can save you hundreds in energy expenses every year and you even get that natural scent in your clothes!

Monday, March 12, 2012

Quick Orange Peel Vinegar Cleaner!

Orange peels, vinegar in a quart jar, let sit for 10 days or so...strain out the liquid and use as an all-purpose cleaner. Easy, cheap, natural, smells good!
 

Sunday, March 11, 2012

Fresh Summery Scented Bedding Year Round: {Tip Sheet}

http://tipnut.com/scented-bedding/

Winters are pretty cold here in Canada so windows are kept shut and clotheslines hang empty for months, but there are a few tricks us Northerners have that help us enjoy fresh, fragrant bedding year round (with no nasty chemicals or expensive laundry products).
Beat Those Stale Winter Blues With These Tips
One of the things I miss most in winter is flinging open the bedroom window, stripping the bedding back and letting nature freshen up my bed linens naturally with sun and fresh air. But this list offers options that are just as easy and will provide a fragrance filled sleep year-round.
Herbal Lavender Dryer Bags
Try these easy to make dryer bags filled with lavender buds, they provide a natural moth repellent, sleep aid and a natural antibacterial.
Perfect for lavender scented bedding, these are very easy to make and Bonus! you can skip the commercial dryer sheets when combined with a vinegar rinse (1/4 to 1/2 cup per load).
Easy Trick Using Essential Oils
  • Directions: Fill a small spray bottle with water then add several drops of essential oil (lavender, mint, whatever you like). Shake then spray a clean white washcloth with the water/EO solution until lightly damp, toss in the dryer with the wet laundry. Scent will transfer to the bedding, lovely!
Lavender Buds Vinegar Rinse
Use this recipe for making a lavender vinegar suitable to use as a laundry rinse and fabric softener (as listed here on Tipnut: Lavender Vinegar Recipes):
  • Handful of Lavender Flowers and 1 Pint White Vinegar
  • Directions: Combine lavender and vinegar, seal and let sit for 6 weeks before using. Strain. Use about 1/4 cup in the rinse cycle, increase up to 1 cup per load if stronger scent is desired.
Scented Vinegar Rinse (Essential Oils)
Use this recipe (as listed here on Tipnut: Frugral Fabric Softener Recipes & Dryer Sheet Tips):
  • Using 1/4 cup vinegar in your laundry’s rinse cycle keeps clothes soft. You can set aside a vinegar jug just for laundry and add about 2 dozen drops of your favorite essential oil to the vinegar if you’d like (or as much EO as you feel necessary).
Scented Laundry Booster
Directions:
  • Fill a plastic container with baking soda then add a few drops of essential oil to preference (start with about 2 drops per cup). Stir well with a wooden stick or spoon (not one used for cooking). Seal the container and set aside for two weeks.
  • After two weeks use it as a laundry booster (1/2 cup per load in the wash or rinse cycle–your choice). Do not add any commercial fabric softener.
Homemade Scented Fabric Softener
The fragrance is light once bedding has dried and you can increase the amount of essential oils if it isn’t strong enough for you. Choose your favorite scents and add 1/2 to 1 cup of this mixture at the start of the rinse cycle:
  • 1 cup baking soda, 1 1/4 cups warm water, 8 cups white vinegar, Essential Oils of your choice.

Tips & Tricks

Mattress & Linen Freshener
  • Using your blender, grind until fine 1/2 cup of dried herbs (try mint, lavender, lemon balm, etc.).
  • Mix ground herbs with 1/2 cup baking soda.
  • Sprinkle mixture lightly over mattress pad or cover then top with clean fitted sheet.
  • Spread mixture more heavily on top half of bed where upper body rests to enjoy a consistent fragrance.
Here’s another recipe you can try…
Pixie Dust
1/2 cup baking soda
1/2 cup cornstarch
1 1/2 tsp ground orange zest (dried)
10 drops of your favorite essential oil
  • Blend all ingredients together in a blender then pour into a large shaker. Sprinkle on bed linens as needed.
Scented Starch For Linens
You can substitute the lavender EO in this recipe for any fragrance you like. Recipe Source: Storybook Woods:
  • Dissolve 1 tablespoon cornstarch in 1 pint cold water. Add 6 drops of lavender essential oil. Place in a spray bottle. Shake before using.
Fresh pressed linens, nicely starched, and lavender scent wafting in the air. Nice!
Homemade Linen Sprays
Source: Hallmark Magazine
Combine vodka (which is also a disinfectant), distilled water and fragrant oils to make these lovely linen sprays. Here are three easy to mix recipes from Hallmark Magazine (no longer available online):
Pour 2 TBS 100 proof vodka into a 16 or 32-ounce spray bottle then add the following:
  • Jasmine Bergamot: 1 teaspoon jasmine oil and 1/2 teaspoon bergamot oil
  • Lavender Sandalwood: 1 teaspoon lavender oil and 1/2 teaspoon sandalwood oil
  • Vanilla Ginger: 1 teaspoon vanilla oil and 2 drops ginger oil
Directions: Top the vodka and oils with distilled water, cap and shake to mix. Spray linens as needed, shaking bottle lightly before each use.
Herbal Sleep Pouches
  • Insert the herbal pouch inside your pillowcase at night to help relax and fall asleep easier. To help the herbs last longer, store the pouch in a ziploc bag during the day and place in a drawer out of light, take out and insert in your pillowcase each night. Squeezing the pouch a bit before use will help too.
  • Details to make these herbal pouches can be found here on Tipnut: Homemade Herbal Sleep Pouches. These are also called “Dream Pillows”.
Linen Closet Sachets
  • Directions: Mix 50/50 dried lavender and lemon balm and fill cotton fabric or cheesecloth sachets. Tuck sachets into clean folded linens. These will scent the linens while being stored and can be used repeatedly. Lavender and lemon balm together is a very calming and relaxing mix, perfect for bed linens.

Sleep Easy Suggestions

When scenting your bed linens, it’s tempting to overdo it since you’re likely choosing your favorite fragrances. However, a light application is preferable since headaches and stuffiness may occur if fragrances are too strong (you’ll be sleeping on the linens for hours at a time). Strong smells may also keep you awake rather than ease you into a peaceful sleep.
What To Use
Choose scents that are pleasing to you and help you relax rather than those that perk you up. Your sleep will be more peaceful and less restless. This is especially helpful for those suffering from insomnia or who have regular trouble falling asleep. Some suggestions:
  • Lavender
  • Lemon Balm
  • Lilac
  • Rose Petals
  • Peppermint
Peaceful Sleep Mixes
Lavender is commonly recommended as a home remedy for sleep since it’s thought to be effective in inducing a calm and peaceful rest. It’s also suggested as an excellent repellent for dust mites, so it’s a great choice for linens. Most of the mixes I have collected include lavender…
  • Lavender, Lemon Balm
  • Lavender, Rose Petals
  • Lavender, Rose Petals, Thyme, Rosemary
  • Lavender, Rose Petals, Jasmine
  • Lavender, Peppermint
  • Lavender, Lilac
  • Rose Petals, Lemon Balm, Chamomile
When using dried herbs and flowers to fill sachets and sleep pillows or scent bedding, choose those that are pesticide free for best results. Here are several sachet patterns and tutorials to get you started.

Spring Cleaning: A Complete Checklist

http://housekeeping.about.com/cs/cleaning101/a/springclnngguid.htm


The flowers are blooming, the birds are serenading, and our house still feels like it's stuck with winter blues. Spring cleaning is a tradition that allows us to freshen up our homes and get a head start on the hectic seasons of spring and summer. What do you need help spring cleaning?
Spring Cleaning Checklists By Room
These tutorials help with spring cleaning for any room. Each tutorial gives a list of steps, tools and supplies needed, and tips to help you get the job done.
Clearing Clutter and Organizing During Spring Cleaning
One of the biggest parts of spring cleaning is getting rid of clutter that you don't need. Use these resources to clear out your stuff. Cleaning will be a lot easier if the clutter is gone.
Getting the Family Involved in Spring Cleaning
If you need a little help in your spring cleaning endeavors, try to get your family involved. Even the most unwilling helper can make a big difference in the work load.
Extra Spring Cleaning Chores
There are some spring cleaning chores that need to be done seasonally. Even though these chores only need to be done once or twice a year, they will help your home run look better and run smoothly.
Products to Use During Spring Cleaning
The cleaning aisles of our stores are stocked full of supplies to help you clean. Find out what supplies you need and which ones you don't.
Maintaining the Spring Cleaning
If you want some ideas to help you maintain the spring cleaning around your home our 15 minute cleanups can keep that spring cleaning feeling around for a long time.

Spring Cleaning Tips


We all love spring for its fresh and cozy weather. The chirping of birds, flourishing of flowers, refreshing fragrance fills our heart with peace and joy. But to enjoy that feeling, we have to spend some time on cleanliness and hygiene, to make your house get freshen up and get a head start on the seasons of spring and summer. Our superb and easy to use springs cleaning tip will help you make your house keeping workload not felt at all. You will get to know how to clean anything you have at home and I hope you will enjoy browsing our tips.
Let’s get started; Are the walls dirty?  Just follow these simple:

Tips for cleaning walls:

For cleaning interior walls you would need Wall cleaner, mix 1/2 c. ammonia, 1/4 c. white vinegar, and 1/4 c. baking soda to 1 gal. warm water. If you have a textured walls use nylon socks instead of a sponge or cloth to avoid leaving material chunks behind. You can tie a dust cloth over your broom and work from the top down, to dust wall paper. If you have naughty kids, who have filled non-washable papers with pencil marks and drawings with other non-greasy spots, use an art-gum eraser t remove that. You can also remove remove greasy spots or crayon by applying a paste of cleaning fluid and fuller’s earth and cornstarch. Let the wall dry and brush off residue. Repeat the treatment until the spot is gone.
For exterior walls Use a water hose to spray the outside of your house. This will remove siding cobwebs and dirt.
If you have textured siding, attach a car-washing brush to the hose to remove dirt.
Tips to Clean Windows:
You can make your own spray cleaner. Its easy.  Fill a spray bottle with 3 tablespoons ammonia, 1 tablespoon vinegar & the remainder with water. After that Dust blinds by wrapping a cloth around a ruler. Spray cloth with a dusting spray and run the flat end across each blind. After that shine the windows using an old newspaper. To avoid streaks, clean windows on an average temperature, preferably on a cloudy day. Dry windows outside in one direction then inside in the other direction so that If you see a streak, you will know which side is the mistake. To clean window sills, pour diluted rubbing alcohol on a cloth and rub the entire surface. Then dust off the sill with a clean cloth.
Tips to clean Bathroom:

If the bathroom mirror is not clean, to remove the dull haze, rub alcohol on the surface. Rubbing alcohol can remove the dull haze from mirrors. Rubbing alcohols also removes spots from bathroom fixtures. But for having a sparkling Glass shower doors, clean it with white vinegar. If the shower is dirty then use a solution of 1/2 cup vinegar, 1 cup ammonia, and 1/4 cup baking soda added to one gallon of warm water to clean it.
Water spots on metal frames are a great pain in the bathroom. To clean those use the Lemon furniture oil.
Rusty tile marks can be removed with kerosene. Running the shower on hot for five minutes will steam the dirt loose. To clean Grout Wash with 2 tablespoons chlorine bleach in one quart of water. Dry thoroughly, and then apply Several coats of lemon oil. Let dry one hour between coats. Dull walls will shine when washed with vinegar and water and polished with a dry cloth. Lighter fluid will remove most stains from porcelain sinks and bathtubs.
How to keep your kitchen clean:
Remove stubborn water spots from a stainless sink with a cloth dampened with rubbing alcohol. These spots can be removed with vinegar. If the stainless steel is rusty then rub stainless steel sinks with lighter fluid. For a sparkling white porcelain sink, place paper towels across the bottom of your sink and saturate with house hold bleach.  Let it rinse for 8 hour. Be careful and donot use bleach in colored sinks.
To fight with refrigerator odor keep an open box of baking soda. It will absorb odors for a month or so. Can also use a few drops vanilla extract on a piece of cotton placed in the refrigerator. This will eliminate odors.
Wipe refrigerator with vinegar to prevent mildew and Use your vacuum on the front of the coils and motor to remove dust and dirt from the refrigerator.
Appliances Care:

Yellowing of white appliances is a perennial problem. To stop that mix 1/2 cup bleach, 1/4 cup baking soda and 4 cups of warm water. Apply with a sponge & keep for 10 minutes. After that rinse & dry thoroughly. You can also use car wax to wax large appliances and make them shine. You can also use it to remove small scratches as well.
Wood Floors:

You can make your own floor cleaner. It is very easy to make. Make a solution of 1/2 cup of white vinegar in 1 gallon of warm water. Damp mop with a mop squeezed nearly dry. It is safer to mist the mop with the cleaner than to apply to floor. Do a section at a time and throw an old towel on the floor and scoot back and forth with foot to dry and prevent streaks. Standing liquid from mopping, spills, and pet accidents can damage floors.
The greatest damage done to wood floors is from grit. Mats at doors are necessary to collect grit and it’s important to keep these clean. Frequent dust mopping in high traffic areas to collect grit is the best prevention. This should be done based on the amount of traffic, which may require dust mopping several times a day in an active household. The brush attachment of a vacuum can be used (no beater bars). Felt and furniture protectors should be installed on furniture. Never scoot furniture on wood. Put a piece of waxed paper under your dust mop. Dirt will stick to the mop and the wax will shine your floors.
Removing Stains

Stains are our greatest enemies and to fight them is even easier if you are prepared.
Water Stains: Rub the spot with No. 2 steel wood and rewax. For more serious water stains, lightly sand with fine
Sand paper, clean the spot with No. 1 or 00 steel wool and mineral spirits or floor cleaner then refinish and wax.
Cigarette Burns: If not severe, the burn can be removed by rubbing with steel wool moistened with soap and
water.
Heel and Caster Marks: Rub vigorously with fine steel wool and floor cleaner. Wipe dry and polish.
Ink Stains and Other Dark Spots: Use No. 2 steel wool and floor cleaner to clean the spot and surrounding area.
Thoroughly wash the affected area. If the spot remains, sand with fine sandpaper, re-wax and polish. Stubborn
stains may require that you replace the affected area.
Chewing Gum and Wax Deposits: Ice until the deposit is brittle and crumbles off. Pour floor cleaner around the
stain so the fluid soaks under and loosens it.
Alcohol Spots: Rub the spot with liquid or paste wax
Tips to keep Carpets Clean:

To clean dry spots, loosen soil and vacuum away prior to moistening it. When taking out stains, always use a white cloth. If you have dropped Wax  on carpet or upholstery and want to clean it then set a clean, absorbent cloth over the wax stain and hold a hot iron on it. Then remove the cloth. Coat mildly greasy stains with aerosol shaving cream, use a hair dryer to speed dry. Then vacuum. Sprinkle a greasy stain with baking soda, cornstarch or talcum powder. Leave on at least 8 hours, and then vacuum. The works done.
Apply these simple and effective tips and have a happy spring!!

75 Extraordinary Uses for Baking Soda

http://lifehackery.com/2008/07/22/home-4/


Baking soda is a chemical compound that appears as a fine powder. It releases bubbles of carbon dioxide when it interacts with an acid and a liquid. It’s most commonly used in baking, where it acts as a leavening agent. The following are 75 other uses for baking soda aside from making muffins soft and fluffy.
Health Uses
1. Use it as an antacid.
2. Use it as underarm deodorant by applying it with a powder puff.

deodorant
3. Mix half a teaspoon with peroxide paste and use it as toothpaste.
4. Use it as a face and body scrub.
5. Add a cup to bathwater to soften your skin.
6. Relieve skin itch from insect bites and pain from sunburn.
7. Remove strong odors from your hands by rubbing them with baking soda and water.
8. Put two tablespoons in your baby’s bathwater to help relieve diaper rash.
9. Apply it on rashes, insect bites, and poison ivy irritations.
10. Take a baking soda bath to relieve skin irritations.
11. Heartburn? Take a teaspoon of baking soda mixed with one-half glass of water.
12. Freshen your mouth by gargling half a teaspoon of baking soda mixed water.
gargling
13. Relieve canker sore pain by using it as mouthwash.
14. Use it to relieve bee stings.
15. Use it to relieve windburns.
16. Apply it on jellyfish sting to draw out the venom.
17. Unblock stuffy nose by adding a teaspoon of baking soda to your vaporizer.
In the Home
flower vase
18. Keep cut flowers fresh longer by adding a teaspoon to the water in the vase.
19. Put out small fires on rugs, upholstery, clothing, and wood.
20. Put an open container of baking soda in the fridge to absorb the odors.
21. Sprinkle it on your ashtrays to reduce bad odor and prevent smoldering.
22. Sprinkle it on your slippers, boots, shoes, and socks to eliminate foul odor.
23. Turn baking soda into modeling clay by combining it with one and 1/4 cups of water and one cup of cornstarch.
24. After feeding your baby, wipe his shirt with a moist cloth sprinkled with baking soda to remove the odor.
25. Wipe your windshield with it to repel rain.
26. Improve the smell of dishrags by soaking them in baking soda and water.
27. Suck it in with your vacuum cleaner to remove the odor.
28. Freshen the air by mixing baking soda with your favorite perfumed bath salts. Put the mixture in small sachet bags.
29. Restore stiff brushes by boiling them in a solution of 1/2 gallon of water, 1/4 cup of vinegar, and a cup of baking soda.
30. Put it under sinks and along basement windows to repel cockroaches and ants.
31. Scatter baking soda around flowerbeds to prevent rabbits from eating your veggies.
32. Sweeten your tomatoes by sprinkling baking soda on the soil around your tomato plants.
33. Sprinkle it onto your cat’s litter box to absorb the bad odor.
34. Sprinkle it on your pet’s comb or brush to deodorize their fur and skin.
In Cooking
35. Use it as a substitute for baking powder by mixing with it with cream of tartar or vinegar.
36. Wash fruits and vegetables with it.
washing vegetables
37. When boiling a chicken, add a teaspoon of baking soda to the water. Feathers will come off easier, and the flesh will be clean and white.
38. Soak dried beans to a baking soda solution to make them more digestible.
39. Remove the distinctive taste of wild game by soaking it in a baking soda solution.
40. Make a sports drink by mixing it with boiled water, salt, and Kool-Aid.
41. Remove the fishy smell from your fillets by soaking the raw fish in a baking soda solution for an hour inside the fridge.
42. Make fluffier omelets by adding half a teaspoon of baking soda for every three eggs used.
omelet
43. Reduce the acid content of your tomato-based recipes by sprinkling them with a pinch of baking soda.
Cleaning Purposes
44. Add a cup to the toilet, leave it for an hour, and then flush. It will clean the toilet and absorb the odor.
flushing toilet
45. Use it to scrub sinks, showers, plastic and porcelain tubs
46. Spray it on walls, mirrors, and countertops.
47. Add a spoonful to your dishwasher to make scrubbing dishes easier.
48. Remove grease from pots and pans.
49. Dry clean carpets and upholstered furniture by sprinkling baking soda over the fabric and gently brushing it. Leave it for an hour or overnight, then vacuum.
50. Boost your laundry detergent’s cleaning power by sprinkling a handful on dirty clothes.
51. Combine it with water to make a paste for polishing stainless steel and chrome.
52. Remove scratches and crayon marks from vinyl floors and walls.
53. Clean your shoes with it.
cleaning shoes
54. Clean garbage cans with it.
55. Use it to wash diapers.
56. Clean the fridge with it.
57. Soak brushes and combs in a baking soda solution.
58. Mix it with water to wash food and drink containers.
59. Put three tablespoons of baking soda to a quart of warm water, then use the mixture to wash marble-topped furniture.
60. Absorb it with a damp sponge, then clean Formica countertops with the sponge.
61. Use it to get rid of stale odors from cooling containers and thermos bottles.
62. Run your coffee maker with a baking soda solution, then rinse.
63. Combine with hot water to clean baby bottles.
64. Sprinkle it on barbecue grills, then rinse it off.
65. Scatter it on your greasy garage floor, scrub the floor, and rinse.
66. Remove burned-on food from a pan by soaking it in a baking soda solution for 10 minutes before washing.
67. Clean your ashtrays with a baking soda solution.
68. Keep your drains clean by putting four tablespoons of baking soda in them each week. Flush it down with hot water.
69. Clean your shower curtains by soaking them in baking soda and water.
70. Put it on a small brush to rub canvas handbags clean.
71. Use it to remove melted plastic bread wrapper from a toaster. Sprinkle baking soda on a damp rug, then use the rug to clean the toaster.
72. Use it to clean your retainers and dentures.
cleaning dentures
73. Make a thick paste of baking soda and water, and used it to scrub enameled cast iron and stainless steel.
74. Mix four tablespoons of baking soda with a quart of warm water, and use it to clean the inside part of an oven.
75. Use it to unclog gas stoves.
The most amazing thing about baking soda is that it’s very cheap. You can do all these things for a very small cost. Baking soda is truly a miracle product, whether it’s used for baking or not.

Fabric Softener Recipes & Dryer Sheet Tips

http://tipnut.com/frugral-fabric-softener-recipes-dryer-sheet-tips/

Here are several quick tips for cutting costs on fabric softeners and sheets, each point is a separate tip. Next you’ll find two recipes for making your own (one scented), plus instructions for reusable dryer sheets, bags and wool balls.

Save Money By Using Frugal Fabric Softeners That You Can Make Yourself
  1. Using 1/4 cup vinegar in your laundry’s rinse cycle keeps clothes soft. You can set aside a vinegar jug just for laundry and add about 2 dozen drops of your favorite essential oil to the vinegar if you’d like (or as much EO as you feel necessary).
  2. In a pail mix 1 gallon of water and 1 cup concentrated liquid fabric softener. Dip a sponge or washcloth in the liquid, squeeze out excess and toss in the dryer with your laundry. Seal pail when not in use.
  3. Pour liquid fabric softener and hot water in a spray bottle (50/50 mix) and lightly mist wet laundry before starting the dryer. Two or three good shots should do it. You could also just spritz a clean washcloth and toss that in the dryer.
  4. Cut dryer sheets in thirds or halves, use one strip per dryer load.
  5. Mix equal parts hair conditioner and water and store in spray bottle. Mist a washcloth or sponge and toss in dryer with wet load.
  6. Use about 1/4 to 1/2 of the liquid fabric softener that they recommend on the bottle.
  7. 1/8 cup baking soda added to laundry and 1/4 cup vinegar in the rinse cycle.
  8. Use a Downy ball if you have one–just use vinegar instead.
  9. Soak a washcloth in full strength liquid fabric softener. Wring out excess, then lay out to dry first before using–helps prevent staining laundry the first time. To use: toss the dried washcloth in the dryer and use again and again until it no longer works. Resoak when needed (you should be able to do a few dozen dryer loads per soak).
Recipe:
1 part Vinegar
1 part Baking Soda
2 parts Hot Water
  • Place a pail large enough to hold double the amount of ingredients in the kitchen sink or bathtub. Mix the baking soda and water in the pail, stir till the powder is dissolved. Then add the vinegar.
  • Remember that baking soda and vinegar reacts with fizzing, so use a big pail to account for this. Once it’s stopped fizzing, pour into clean bottles, cap, then use 1/4 cup per rinse cycle.
  • Updated Info: The baking soda won’t be completely dissolved, just shake the bottle to mix the batch up before adding to the rinse cycle.
Scented:
Cheryl sent in this recipe that is scented with your favorite essential oils.

Freshen & Soften Laundry With Your Favorite Scents Using This Easy Recipe


I’ve had good success with this fabric softener and enjoy trying different fragrances just to keep things interesting. The scent is light once clothes have been dried and you can increase the amount of essential oils if the fragrance isn’t strong enough for you.
Ingredients:
1 cup baking soda
1 1/4 cups warm water
8 cups white vinegar
Essential Oils
Directions:
  • First mix the vinegar and water together then add the baking soda gradually, stirring the whole time. You will want to make sure to use a large pail to accommodate the fizzing activity from the baking soda and vinegar reaction.
  • Use a funnel to pour this mixture into a washed, gallon sized milk jug (plastic), add 1/3 teaspoon of your favorite essential oil, cap and seal then shake well.
  • To use: Shake each time before use, adding 1/2 to 1 cup at the start of the rinse cycle.
Thanks for sharing this recipe Cheryl!
For essential oil ideas, consider germ fighting gems like Eucalyptus or Tea Tree. If scent is what you’re after, consider lavender or even citrus favorites like orange or lemon.
Reusable Dryer Sheet Instructions:
Flannel pieces
4 TBS liquid softener
10 TBS water
  • Cut fabric sheets from old flannel pajamas or leftover flannel fabric from sewing and cut into 3″ x 5″ strips (approximately).
  • Stack flannel strips in a cleaned margarine tub (large size) or plastic container (cleaned baby wipes container works well too). Mix the liquid softener and water together, then pour evenly over top of stacked flannel strips.
  • Seal container and shake well.
You can use several dozen strips with this mixture. Leave sealed for 2 or 3 days, then use one flannel strip per load–squeeze out excess if necessary (it should be just damp). Keep container sealed at all times. Wash strips after use, then use again to make another batch when needed.
Herbal Lavender Bags:
*First published September 27, 2007 and moved to this page for better organization
Fresh and fragrant laundry can be achieved chemical free with easy to make lavender dryer bags. Using lavender buds gives the benefit of a natural moth repellent, sleep aid and a natural antibacterial.
Skip the fabric softener sheets, use 1/4 cup vinegar in your rinse cycle (for static cling help, up the amount to 1/2 cup if needed) and toss the herbal sachets in the dryer for fresh smelling laundry. For optimal benefit, use organic lavender.
Materials Needed:
5″ x 5″ cotton muslin or cheesecloth squares (2)
Thread
Lavender
Directions:
Lavender & Towels
Lavender & Towels
  • Sew large “tea bags” out of the muslin or cheesecloth squares, leaving an opening at the top to fill with lavender. Sew the top shut. No need to sew fancy, just place the squares together and sew a single seam along the top about 1/4″ from the edge.
  • Roughly squeeze the bags before tossing in the dryer with wet laundry. When laundry is done the scent is light, not overwhelming at all. Especially nice to use on loads of bedding (sweet, fragrant dreams).
  • Bags are reusable! When the lavender is no longer doing its job, take a seam ripper and open about 2″ on one end, empty the bag, refill and sew shut. For one last kick at the can, crush the used lavender and toss it around your carpet. Let sit for about an hour then vacuum.
Tip: Make more than one dryer bag so that the same bag isn’t in one load after another, alternate them so each bag has a chance to cool down before being used again.
How To Make Wool Dryer Balls:
*First published July 30th, 2008 and moved to this page for better organization
Never buy fabric softener again with today’s feature from Good Mama: Make Your Own Wool Dryer Balls, how cool are these! The balls will cut your drying time yet leave clothes soft, fluffy and static free without the use of chemicals or dryer sheets. Based on the old “tennis ball in the dryer” trick, but without the tennis balls!
What You’ll Need:
DIY Wool Dryer Balls from goodmama.typepad.com
DIY Wool Dryer Balls By goodmama.typepad.com
  • Wool Yarn: Use 100% wool or a good felting yarn for best results. . . Great yarn stash buster!
  • Old Pantyhose: You can also use a sock
  • Cotton or Acrylic Yarn or String: Use to tie closed the hose (or sock). Don’t use wool yarn for this part–scraps are good for this too.
  • Scissors
  • Small Crochet Hook
  • Measuring Tape
  • Optional – Sachet of Dried Flowers or Herbs: Make your own scented dryer balls by winding your ball around a little sachet of fragrant dried herbs & flowers. The scent doesn’t last forever, but still a nice touch!
Basic Steps:
  • First make the core by winding small balls of yarn (tight), then tie them off in a nylon stocking or sock. Wash the batch in preferably hot water and dry to felt them (keep the balls attached together in the stocking, you don’t need to cut them off to separate at this point). Wash and dry again if you want to felt them more.
  • Next cut the balls loose from the stocking, wind more yarn around the balls to the size you want, tie them off in a nylon stocking again and wash then dry to felt. Doing this in two steps keeps the inside of the balls tight and will hold together better than a ball done in one step.
  • Once they’re at least slightly felted, the balls are good to use. They will continue to felt and get harder as you use them.
Tips:
  • If the yarn is machine washable, don’t use it for this project.
  • Use a crochet hook to tuck in the ends of the yarn so the ball stays tight and doesn’t loosen up through use.
  • Wind the balls about 10-10.5 inches in circumference prior to felting, they will shrink as they felt.
  • When first making the balls and felting them, you can toss them in with loads of laundry to save water and time. Be aware there may be some dye bleeding though if it’s not colorfast yarn–throw them in with a load of towels in similar colors.
  • When ready to use, start with a couple balls in the dryer then work your way up to the amount of balls that give you the best results.
  • The wool balls may get pills on them with use, just give them a shave with a sweater shaver as needed (if you want–otherwise ignore!).
Please visit Good Mama for a complete set of details that include a lovely set of photos outlining the entire process for making the dryer balls (link at the top), also note her copyright and the licenses and restrictions.

Homemade Cleaners For The Bathroom {Peppermint}

http://tipnut.com/homemade-cleaners-bathroom/

Shower Scrub
Mint Essential Oil
Mint Essential Oil
1 cup baking soda
1/4 tsp peppermint essential oil
  • Mix the ingredients then store in a glass mason jar.
  • To use: Sprinkle on a wet sponge and scrub bath and shower walls. Rinse off with water.
All-Purpose Spray
1 cup distilled water
1/2 cup household vinegar
1/2 tsp liquid castille soap
1/4 tsp Peppermint essential oil
  • Mix ingredients in a spray bottle and shake before use.
  • To use: Spray on tiles and walls, wipe clean with a damp sponge.
Floor Cleaner
1 gallon hot water
2 TBS liquid castille soap
1/4 tsp Peppermint essential oil
  • Mix ingredients in a large bucket.
  • To use: Mop floor.
Bathroom Mold Remover
1/2 cup vinegar
1/2 cup salt
1/2 tsp peppermint essential oil
  • Mix ingredients in a spray bottle, shake well before use.
  • To use: Spray mold then leave sit for a few minutes before wiping off mold.
Toilet Bowl Cleaner & Freshener
1 cup baking soda
1 cup vinegar
  • To use: First drizzle baking soda into the toilet. Top with vinegar. Allow to fizz for 10 minutes then use a toilet brush to scrub toilet clean. After cleaning the toilet, wipe underneath the seat and around the rim with a damp cloth that has a few drops of peppermint essential oil.

10 Laundry Boosters Using Vinegar

http://tipnut.com/laundry-boosters-vinegar/

  1. Picture of Laundry Basket  - Tipnut.comColor Brightener: Add 1/2 cup vinegar to a load of laundry (wash cycle).
  2. Color Protector: Soak new items in a straight solution of vinegar to protect dyes from running.
  3. Whiter Whites: Add 1 1/2 cups of vinegar to the rinse cycle to whiten clothes.
  4. Restore Whites: Fill a large stock pot half full with water and 1 cup of vinegar, bring to a boil. Remove from heat, add garments and let soak overnight. Launder as usual.
  5. Preserve Linens: Add 1 cup of vinegar to rinse cycle, store linens as needed–will help prevent yellowing.
  6. Yellowed Items Reviver: Revive old yellowed garments & linens from storage by soaking overnight in a solution of 12 parts water to 1 part vinegar. Launder as usual. Also see Cleaning Vintage Linens Soak.
  7. Heavy Duty Pre-Soak: For heavily soiled garments, first soak in a bucket of water with 1 cup of vinegar. Launder as usual.
  8. Lint Busters: Add 1/2 cup vinegar to the rinse cycle to reduce lint.
  9. Fabric Softener: Add 1 cup of vinegar to the rinse cycle. Also see Frugral Fabric Softener Recipes & Dryer Sheet Tips.
  10. Ring Around The Collar Remover: Use 3 parts baking soda to 2 parts vinegar to make a paste, rub into stain and allow to set for 60 minutes, launder as usual. Also see Laundry Stain Treatments (Ring Around The Collar).
*All directions refer to regular white distilled vinegar
Source: Found in the book Vim & Vinegar by Melodie Moore
Tip: You can use lavender vinegar in the rinse for a nice scent.
More Laundry Tips:

Surprising Cleaning New Uses

Surprising Cleaning New Uses

More hidden tricks to get your house sparkling in record time.

There were so many amazing ideas, I chose not to bring them all over to this blog so please check it out by clicking on:
http://www.realsimple.com/new-uses-for-old-things/new-uses-cleaning/print-index.html

Can of cooking spray and a shovel

Sunday, February 19, 2012

Easy Ways To Remove Limescale With Basic Pantry Items

Check out: http://tipnut.com/limescale/

All It Takes Is A Few Simple Ingredients To Beat The Limescale Blues
For taps and bathroom fixtures: Saturate paper towels or a cotton cloth with vinegar then wrap tightly around the problem area. Leave for several hours or overnight, drizzling more vinegar over the cloth if it gets too dry. After soaking, remove the cloth and scrub away the built-up crud using a toothbrush or scrubber. You’ll find more detailed info below.
For tap openings: If the opening has a buildup that is affecting water flow, fill a plastic bag with vinegar then fit over spout so the end is submerged in vinegar. Wrap the bag around the tap then secure in place by wrapping with masking tape. Allow to soak for several hours (or overnight), remove the bag then take a toothbrush and scrub up into the spout, removing the buildup.
For small appliances: Coffee pots and kettles will naturally build up limescale over time, vinegar will do the trick here too. Follow the directions on this page (will work for both coffee pots and kettles).
For large appliances: Dishwashers and laundry washing machines can benefit from a treatment of vinegar and water, simply dump a cup or two of household vinegar into the appliance and run an empty load with hot water.
Toilet rings & stains: Lower the water inside the toilet bowl so you can lay vinegar-soaked paper towels on top of the stains, or you can use a wet pumice stone to scrub them off. You’ll find the step-by-step directions on this page.
What else works: A lemon cut in half or lemon juice (both freshly squeezed and bottled will work). Use the juice just as you would with the vinegar directions above. To use a fresh lemon, cut it in half then use the cut side to scrub surfaces such as shower doors and walls. A lemon cut in wedges can also be handy when trying to get at the crevices of shower tracks, just squeeze a bit of juice into the tracks and use the edge of the lemon wedge to get into the crevices.
Why Does This Work: The acid from the vinegar and lemon works to dissolve the calcium carbonate, doing all the heavy lifting for you while it soaks. After a few hours (or several depending on how bad the buildup is), all it takes is a light scrubbing on your part to remove the cruddy bits.
Tip: You may also find it helpful to sprinkle a bit of baking soda over the problem area (or over the cut lemon or damp cleaning sponge) so you have a mild abrasive to help with the scrubbing job. To use it, wait until after the vinegar or lemon juice soaking period before applying it (so the acid in the ingredients has the opportunity to work its magic).
Notes: If the first treatment brings results but doesn’t remove all the crud easily, repeat the process again. If you’re unsure how a surface will react to a vinegar soak, test a hidden area first.
Vinegar is a miracle worker when it comes to household cleaning, you’ll find more ways to use it listed on this page (which also touches briefly on the tips above).

Cleaning Crusty Tap Fixtures & Shower Heads

*First published January 11, 2007 and moved to this page for better organization
Picture of Bathroom Faucet - Tipnut.comTaps can accumulate hard water stains around the base and limescale crud along the back if they’re not thoroughly washed regularly. If yours have a bad buildup, here’s what you can do…
Materials Needed
Paper Towels
White household vinegar
Directions:
  • Soak paper towels thoroughly with vinegar, then pack firmly around the base of the tap fixture. If you have hard water deposits between the faucets and the base as well–pack soaked towels in there too.
  • Every couple hours recheck the paper towels and if they’re dry, pour more vinegar on them. Depending on how bad the deposits are, you may have to leave them wrapped overnight to soak.
  • Once the crud wipes away easily, remove the paper towels, get out an old toothbrush and scrub away. They should clean up easily with the crud just falling away.
Give it a shot–you’ll be amazed how shiny new your taps will look!

Shower Heads
Shower Head Picture - Tipnut.com
If your shower head has a few holes clogged from hard water deposits and limescale, all you need to do is give it a good soak in a vinegar & water solution.
Details:
  • Soak the show head in a pail of 50/50 vinegar and hot water for several hours. The vinegar will eat through the hard gunk and you’ll be back in business with a fully functioning, shiny shower head!
If it’s especially bad, just increase the amount of vinegar and let it soak overnight.

Monday, February 6, 2012

Homemade Toilet Bowl Cleaner

http://everythingishomemade.com/2010/10/26/homemade-toilet-bowl-cleaner/

By Amy:
Have I got a gem for you today.  Several weeks ago I whipped up a homemade toilet bowl cleaner when I was cleaning my bathrooms one weekend.  I wanted to share it, but  I didn’t write anything down of course and couldn’t remember what all I used.  So the next time I cleaned my bathroom I made sure to measure and write down the ingredients so that I could share the recipe with you.
I had never made homemade toilet bowl cleaner before because to be honest, I wasn’t sure how to apply it!  Commercial cleaners have that nice angled neck on the bottle that allows you to squirt the cleaner right up under the rim.  I wasn’t about to stick my hands up under there so I continued on using commercial cleaners until just recently.
Then it struck me one day that I could use a condiment squirt bottle!  In the picture below, it’s the bottle on the far right hand side.  I had picked up two of these bottles one day a long time ago at Bed, Bath & Beyond.  I believe they were around $2 each.  One I use for white vinegar in the kitchen.  And the other one just sat there unused.  I think I had intentions of putting chocolate sauce in it so I could make fancy desserts, but well that never happened.  So I’m using it for toilet cleaner instead. :D
Here are all the ingredients and supplies you need besides a spoon and water which are not pictured.  So simple!  I usually make enough to clean the 2 toilets in the house and that’s it.  The cleaner will stay good for awhile, but it’s so easy to make that I just make up a new batch each time I’m cleaning.

Homemade Toilet Bowl Cleaner
Enough to clean 2 toilets
3/4 cup baking soda
1/2 cup water
1/2 tsp castille soap with tea tree
(Alternatively you can use regular castille soap and then add a few drops of tea tree oil)
Large measuring cup or bowl with a spout
Condiment squirt bottle
Spoon
In the measuring cup, stir together the baking soda and water.  It should be slightly thick.  You want it to be thick so it will coat the toilet bowl.  Then add 1/2 tsp of castille soap and stir.

Once combined, pour mixture into the condiment bottle (this is why having a spout on the bowl is handy).

With your finger over the tip, shake to combine again.

Make sure all the baking soda that settled to the bottom gets incorporated into the mixture.

Now you are ready to clean the toilet!
The application can be a little tricky.  You have to angle the bottle down so the mixture goes to the tip.  But yet you want it up slightly so you can squirt it up under the rim.  You’ll get the hang of it after a few tries.

From here, the cleaning is exactly the same as with commercial cleaners.  I squirt the homemade stuff all around the bowl, up under the rim.  It runs down and coats the bowl, just like the expensive stuff.  I let it sit for several minutes and then scrub it out with the bowl scrubber.
I’m no scientist, so I can’t test my toilet for bacteria and all that.  So I can’t tell you for certain how well the homemade cleaner works.  But I will say that my toilet looks clean and smells clean!  And really, isn’t that all the certainty you get from the commercial cleaners anyway?
If you try this, let me know how it works!

Sunday, February 5, 2012

Homemade Fruit & Vegetable Wash

http://tipnut.com/produce-wash/

Easy To Make

1 cup water
1 cup vinegar
2 TBS baking soda
2 TBS lemon juice
Directions:
  • Mix ingredients then pour in clean spray bottle. Spray fresh produce generously. Sit for 5 minutes then rinse off well.
  • Note: Make sure to first mix ingredients in deep container since there will be some fizzing from the baking soda & vinegar.
There are also these tips and recipes to try:
*Make sure the sink is thoroughly cleaned or use a plastic dishpan just for this purpose
  • Sprinkle items with baking soda then gently scrub and rinse. This cleaning method safely removes dirt and residue off produce. Mentioned previously on this page: 50 Quick Tips For The Kitchen.
  • A mix of 50/50 vinegar and water sprayed on fresh produce also works as a good cleaner. Let sit for a few minutes before washing off.
  • Add 1/4 cup of apple cider vinegar for every sinkful of water (standard size). Soak items for a minimum of 15 minutes before rinsing off and preparing.
  • Parasite buster: Add 1/2 teaspoon of chlorine bleach per sinkful of water and soak items for 30 minutes. Rinse then soak in clear water for a minimum of 10 minutes.
  • Add 2 teaspoons of hydrogen peroxide (3%) per gallon of water and soak items for 20 minutes. Rinse then soak in clear water for a minimum of 10 minutes.
  • Residue cleaner: Add a few drops of your favorite liquid dish detergent (for handwashing dishes) to water, soak items for a few minutes then scrub and rinse well under clear running water.
  • Arrange fresh fruit and veggies in the sink then fill with water. For every gallon (16 cups) of water used, add 4 drops of grapefruit seed extract and an 1/8 cup of salt. Soak for a minimum of 10 minutes then rinse in clear water.
Fresh Produce Soak:
1/2 cup vinegar
3 TBS salt
  • Mix ingredients to dissolve salt then add to sinkful of water (stir to mix). Soak items for 15 to 20 minutes. Remove, pat dry.
Did You Know: You should wash the outsides of melons before cutting through them? If you don’t, the knife will drag the pesticides/dirt/bacteria from the outside rind into the fruit as you cut. The outside of melons can carry some seriously nasty cooties. See Melons: Safe Handling Practices for Consumers (pdf).

Homemade Cleaners For The Bathroom {Peppermint}

http://tipnut.com/homemade-cleaners-bathroom/


Shower Scrub
Mint Essential Oil
Mint Essential Oil
1 cup baking soda
1/4 tsp peppermint essential oil
  • Mix the ingredients then store in a glass mason jar.
  • To use: Sprinkle on a wet sponge and scrub bath and shower walls. Rinse off with water.
All-Purpose Spray
1 cup distilled water
1/2 cup household vinegar
1/2 tsp liquid castille soap
1/4 tsp Peppermint essential oil
  • Mix ingredients in a spray bottle and shake before use.
  • To use: Spray on tiles and walls, wipe clean with a damp sponge.
Floor Cleaner
1 gallon hot water
2 TBS liquid castille soap
1/4 tsp Peppermint essential oil
  • Mix ingredients in a large bucket.
  • To use: Mop floor.
Bathroom Mold Remover
1/2 cup vinegar
1/2 cup salt
1/2 tsp peppermint essential oil
  • Mix ingredients in a spray bottle, shake well before use.
  • To use: Spray mold then leave sit for a few minutes before wiping off mold.
Toilet Bowl Cleaner & Freshener
1 cup baking soda
1 cup vinegar
  • To use: First drizzle baking soda into the toilet. Top with vinegar. Allow to fizz for 10 minutes then use a toilet brush to scrub toilet clean. After cleaning the toilet, wipe underneath the seat and around the rim with a damp cloth that has a few drops of peppermint essential oil.

Homemade Toothpaste, Mouthwash & Teeth Whiteners

http://tipnut.com/homemade-toothpaste-mouthwash-teeth-whiteners/

thriftysoaper.blogspot.com

Here’s an assortment of recipes and tips for making your own toothpaste, teeth whiteners and mouthwash. Many use simple ingredients and are easy to whip up (pretty frugal too!). These were previously published on different pages and combined here for one handy project sheet.

Ingredients needed:
  • Baking Soda
  • Xylitol (this is a natural sugar substitute that you can find in your local health stores or online)
  • Salt
  • Liquid Glycerine
  • Essential Oil
You can store the mixture in jars and spoon out as you use it, but one commenter had a clever idea to keep it in capped squeeze bottles–just pipe out what you need mess-free. Please visit the site above for the recipe and all the details.

For those that can’t watch the video, here are the details:
Ingredients:
1/4 cup Vegetable Glycerin
1/4 cup Baking Soda
10 to 15 drops of Peppermint Essential Oil (food grade)
  • Directions: Too easy! Just mix the items together and voila! it’s ready to use.
What this clever gal did was cut open an empty (used) tube of toothpaste, cleaned out the inside then scooped the mixture into the tube. Fold over the cut end of the tube then secure with a squeezer or packaging clamp. This one’s goopy and can be a bit runny so it’s not thick and pastey like commercial products (which may take a bit of getting used to), but it does the trick and it’s so cheap to make!
Quick & Easy Paste:
1 tsp baking soda
1/4 tsp hydrogen peroxide
  • Mix into a paste then brush teeth
Simple Tips

DIY Whiteners:
Fruity
1 tsp baking soda
1 TBS fresh, mashed strawberries
  • Mix into paste then use to brush teeth
Lemony
  • Sprinkle baking soda on a lemon wedge then gently rub upper and lower teeth for 1 minute upper and 1 minute lower. Then brush as usual. Don’t do this more than once per week.
Mouthwash Recipe:
3 cups boiling hot water
3 tsp fresh peppermint leaves
2 tsp fresh coriander
1 tsp anise seeds
  • Mix all ingredients, cover and let sit for 25 minutes. Once cool strain the liquid and bottle in a sterilized jar.

Followers